Thursday, December 23, 2010

Chocolate Turtle Cookies


I'm back.  I know I said that my last posting would be it until January but our flight to London was canceled due to bad weather.  On to plan b.  We have rescheduled our flight but with the state of the airports, I'm not getting my hopes up too high.  Lucky for me and you, I am now able to share with you a really good cookie recipe. 

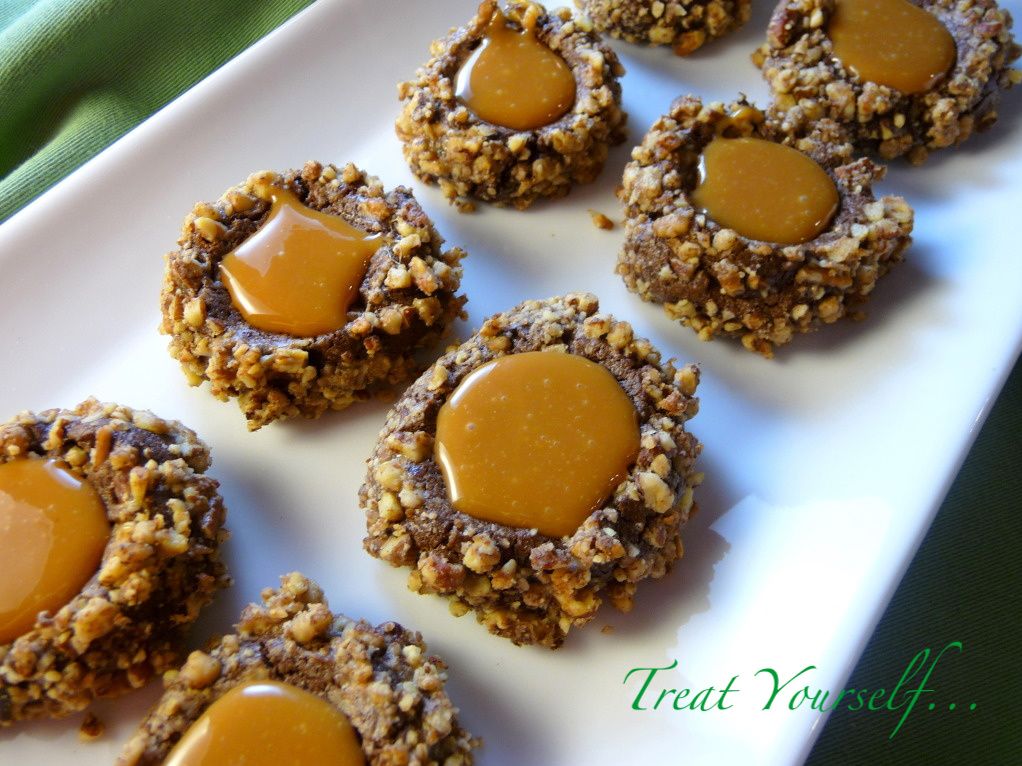
I knew when I saw this recipe, these would be good, especially with the caramel.  But, I didn't know they would be so good, that I would have a hard time not eating them.  I have a weakness for cookies though so that's not saying much.  These cookies are chocolaty, nutty, chewy and will satisfy any sweet tooth.

I added some chocolate chips to make them really chocolaty and some espresso powder, which I think intensifies the chocolate flavor.   

Our freezer is full of cookies this year.  Between a girls cookie party and me experimenting on my own, we have lots of cookies.  Too bad I can't share them with you all.

These are what I call high maintenance cookies in that they don't transport well unless you lay them in one layer and keep them flat.  I think they're worth it though.  Just make sure you're not alone with them in your kitchen or I can't be responsible for what might happen.  :-)


Chocolate Turtle Cookies

1 cup all purpose flour
1/3 cup unsweetened cocoa powder
1/4 teaspoon salt
8 tablespoons unsalted butter, softened
2/3 cup sugar
1 large egg, separated, plus 1 egg white
2 tablespoons milk
1 teaspoon vanilla extract
1 teaspoon instant espresso powder
1/2 cup chocolate chips (I used semi-sweet)
1 1/4 cups pecans, chopped fine (I used a 1 lb. bag of chopped pecans from Trader Joe's)
14 soft caramel candies
3 tablespoons heavy cream

Combine flour, cocoa, and salt in a bowl.  In a separate bowl, beat butter and sugar until light and fluffy, about 2 minutes.  Add egg yolk, milk, espresso powder and vanilla and mix well.  Add flour a bit at a time, slowly.  Add chocolate chips and mix until just combined.  Wrap dough in plastic wrap and refrigerate until firm, at least an hour.

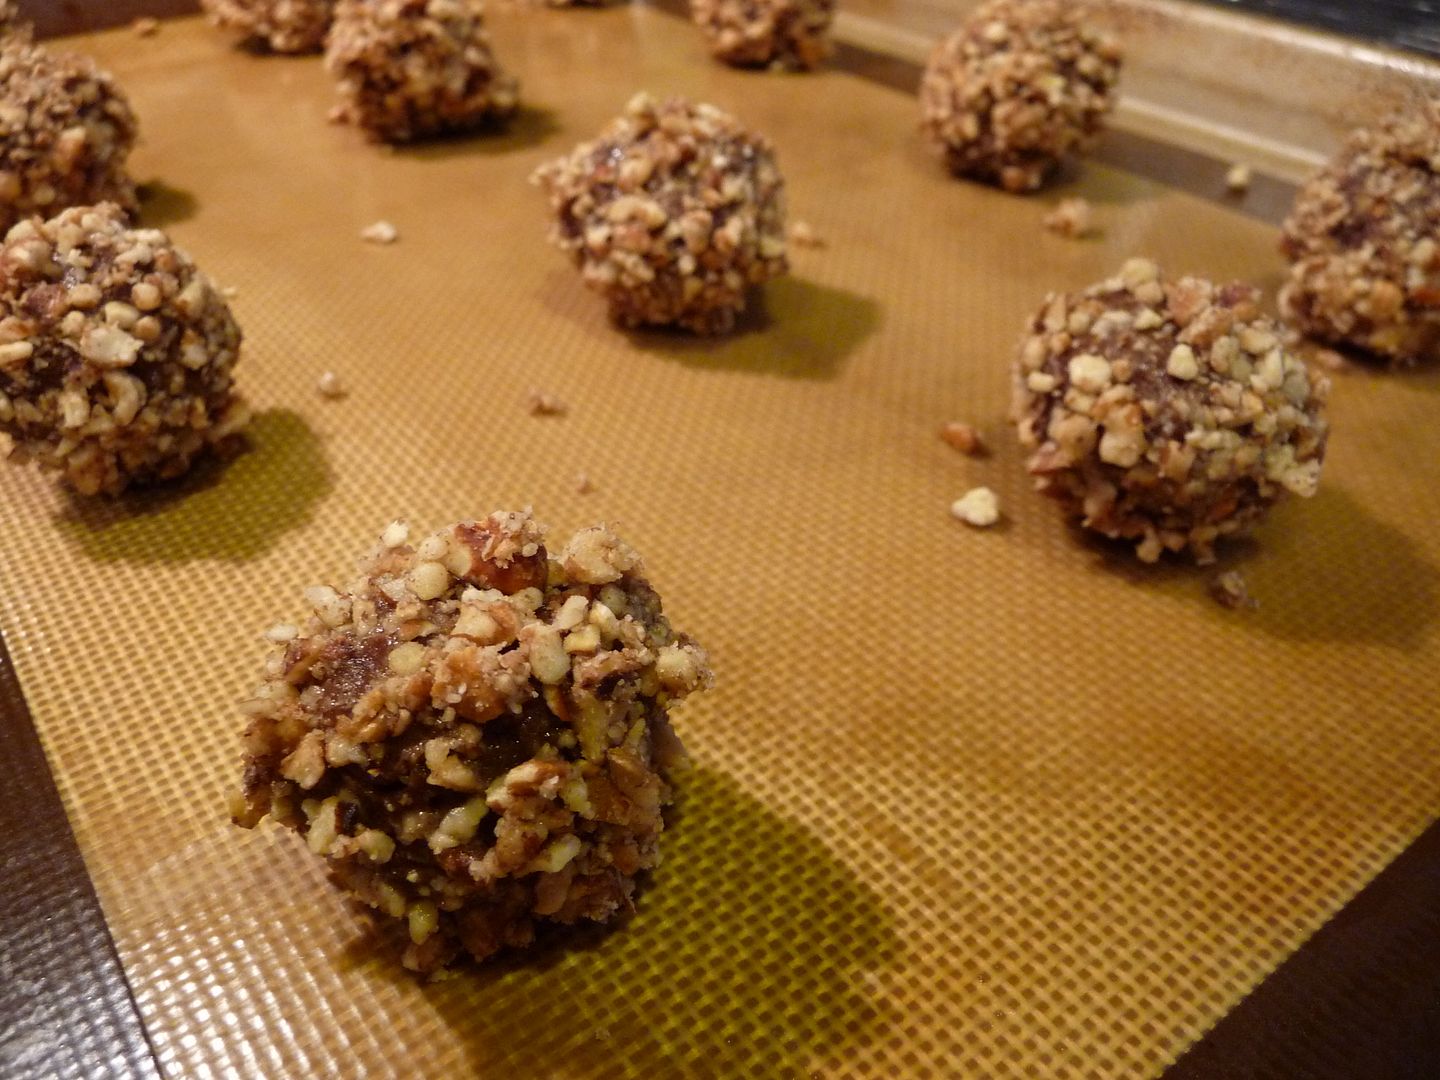
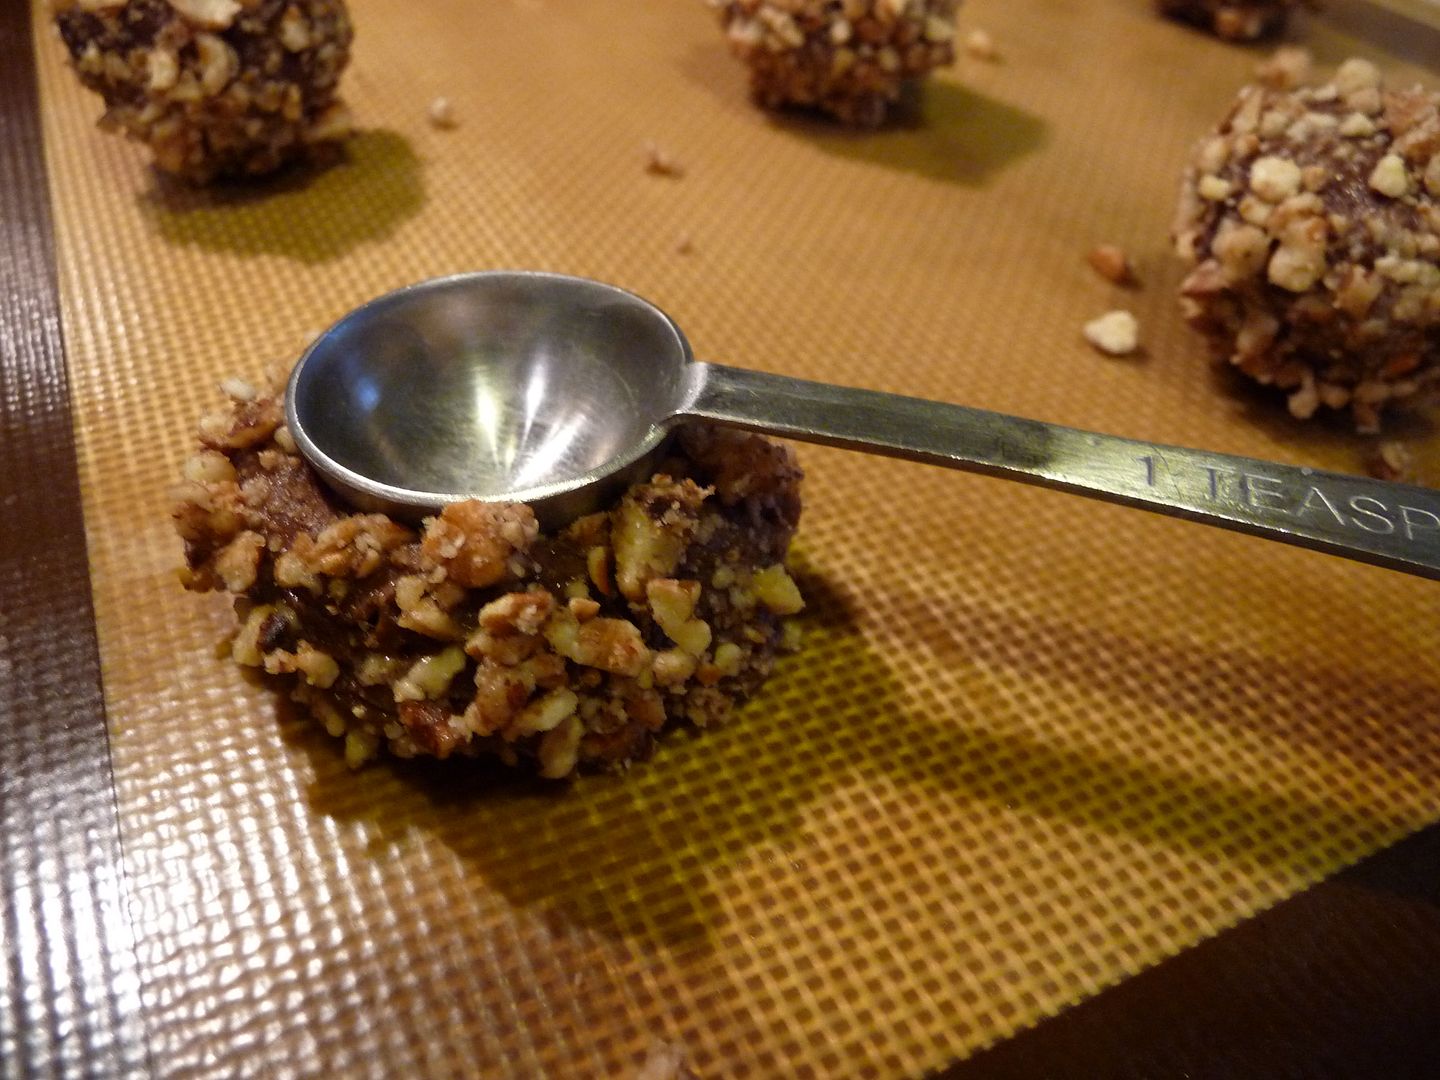
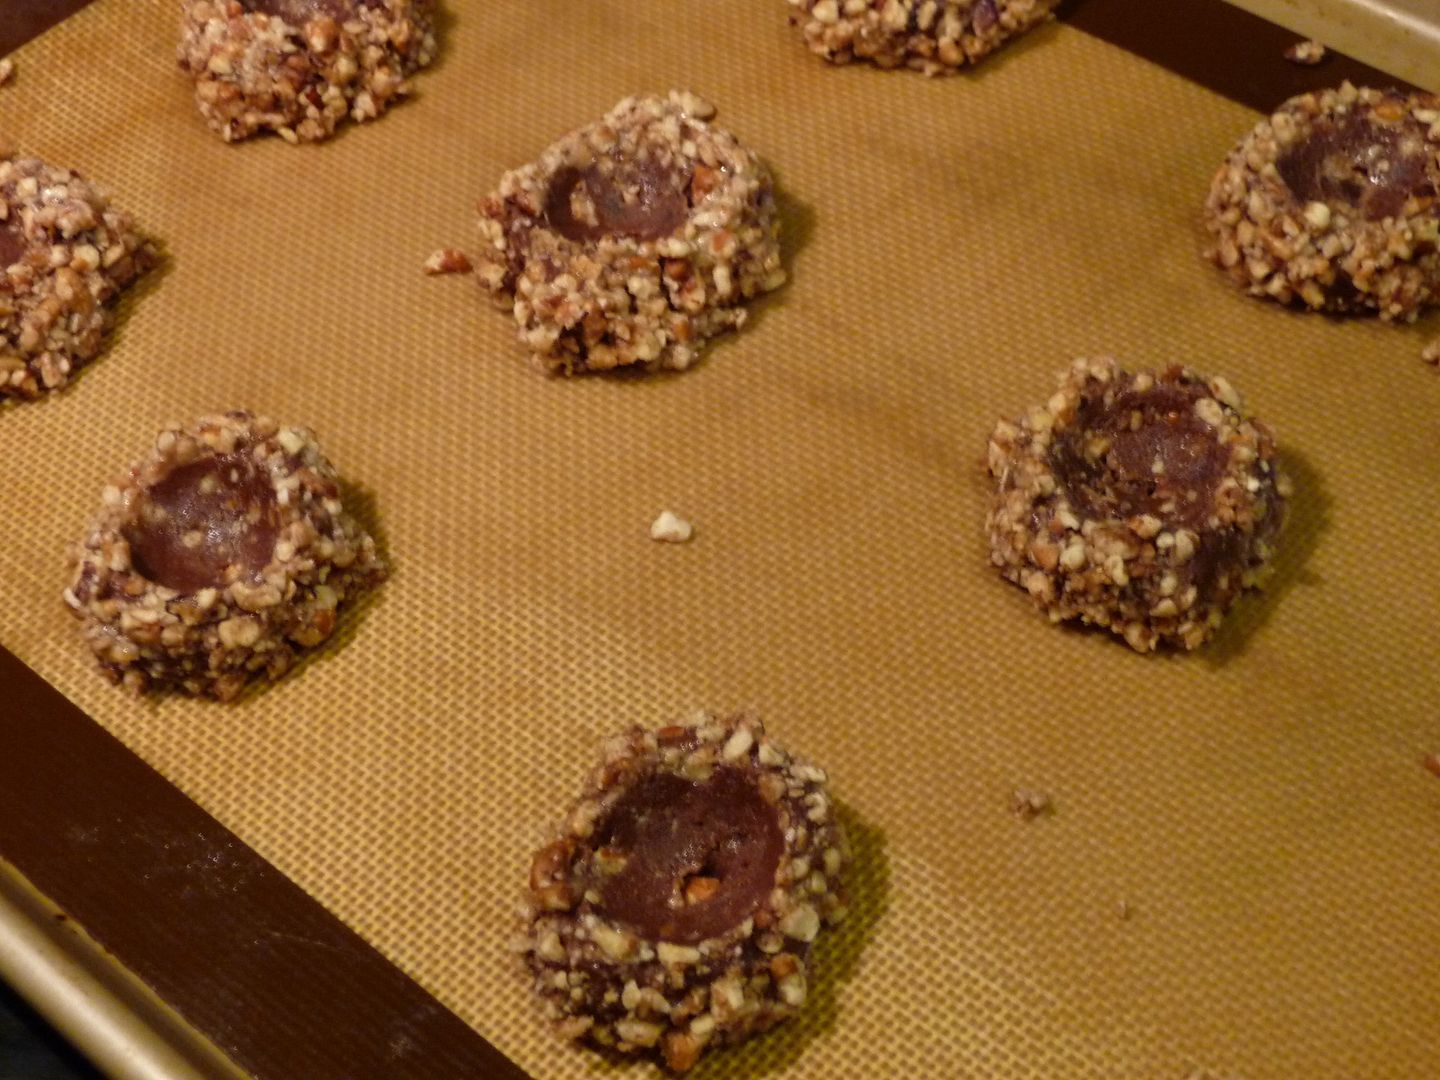
Heat oven to 350 degrees.  Spray or line a cooking sheet.  Add egg whites to a bowl and mix until frothy.  Place chopped pecans in another bowl.  In your hand, roll dough into 1 inch balls, dip in egg white and then roll in the nuts.  Place on the baking sheet (12 per sheet).  With a 1 teaspoon measuring spoon, make an indentation in each cookie to form a well in the middle.  Bake about 12 minutes, rotating sheets halfway through baking.

Add caramels and cream to a bowl and microwave 30 seconds at a time until mixable.  Remove to a wire rack and fill each well with a teaspoon of caramel sauce.  Let cool completely.  Makes 2 1/2 dozen.

Adapted from America's Test Kitchen

Enhanced by Zemanta

Thursday, December 16, 2010

The Best Broccoli Casserole


Has anyone noticed how stressed everyone is right now?  In cars, in stores, you name it.  It's sad really that this time of year becomes a crazy, stressful time rather than a joyous, fun time.  I can relate and I don't even have children.  The holiday season sneaks up on us so quickly and then there is so much to get done by Christmas Day.  It seems like it gets crazier every year.  But as I write this, I am feeling pretty good.  I have my cards done, my shopping, decorating, baking and yesterday, I finished a huge project at work.  Now I can relax and enjoy the holidays.  I hope you can too.   

Now that I'm done venting about the holidays, I want to tell you about this broccoli casserole.  I know what you are thinking, the best, really?  Is it really that good to say it's the best?  YES!!!!!  We make this casserole every year for Thanksgiving and it's one of those dishes that we have to have on the table or we'd all go on strike.  It's always the first dish to go as the guys even love it.  It's creamy, cheesy and crunchy with a nice buttery topping.  I had to make this my final posting before the holidays in hopes that you'll give it a try.

This will probably be my last post until early January.  We are headed to London in two days to spend Christmas with my husband's family.  It will be a nice, fun and relaxing time and when we get back, we'll get to spend New Year's with my family in Oregon.  By the time I get home, I'll need a vacation!  Isn't that the way it always is after the holidays!  We hope you have a fun, relaxing and wonderful holiday season.  The Two True Foodies look forward to sharing more favorite recipes with you in 2011.

Favorite Broccoli Casserole

2 (16oz) bags frozen broccoli
1 can Cream of Mushroom Soup
1/2 cup mayonnaise
1 egg
1 small onion, grated
1 1/4 cup sharp cheddar cheese
1/2 cup melted butter

Bring a big pot of water to a boil.  Add frozen broccoli and cook about 3 minutes.  You basically just want to blanch it.  Drain it really well as you don't want extra water in your casserole.   In a mixing bowl, add the Cream of Mushroom Soup, mayo, egg, onion (grate on a cheese grater) and cheese.  Mix well.  Add the broccoli and gently combine.  Put casserole in a 9x9 baking dish.  Mix the stuffing with the melted butter until well combined.  Sprinkle over the top of the casserole.  Bake for 30 minutes at 350 degrees.


Enhanced by Zemanta

Thursday, December 9, 2010

Christmas Pasta


I'm a big advocate of cooking most dishes from scratch but right now, with the holidays, working full-time, traveling, I end up taking short cuts here and there just to get dinner on the table.  It can still be really good food but just easier to make.  When I don't have a lot of time but want something good and comforting, I always reach for pasta.  It is fast and you can mix just about anything you have on hand with pasta.  It's really hard to ruin.  That's kind of what I did with this easy, flavorful Christmas Pasta dish.

Lately, I have been crazy busy.  I mean so busy that having a nice dinner on the table is becoming rare.  I think my husband was really surprised when he came home last night and smelled something good cooking.  What a treat, huh?  To come home from work and walk into a house that smells so good you could eat the couch.

If you haven't noticed, my postings lately have slowed down.  I have the best intentions of posting each week but with traveling for work, it's been really difficult.  Don't worry though, a new recipe will come, just give me a few more days and I promise to post something good.

For this pasta dish, I used a store bought Alfredo Sauce (Trader Joe's).  I always keep a jar on hand.  I grabbed whatever meat sounded good at the time.  Any veggies I had on hand and threw it all together.  It came out so pretty, looking like Christmas, being all red and green, and tasty, that I had to share it with you.  I know some of you might be saying, well I can't eat that, it's too fattening.  Here is my thought on this, keep your portion size small, add lots of veggies (I served steamed broccoli) and enjoy every bite!  I also added a half a box of pasta rather than a full box just to minimize the carbs.  If you're really concerned about it, save it for a special occasion.  This is a great dish if you need to camouflage veggies from someone.  It works for me every time.  My husbands hates mushrooms but I chop them really fine and he never knows the difference.  Victory is sweet!

Christmas Pasta

1 lb. pork sausage (I used one flavored with sage)
1 16.9 oz (or 1 lb) jar Alfredo Sauce
1/2 lb. pasta (I used Fusilli Col Buco) any kind will work
1 tablespoon olive oil
2 tablespoons salt
1/2 package frozen spinach, chopped
1/4 cup vegetable broth (can use chicken)
1/2 jar sun-dried tomatoes in olive oil, chopped
1 package of mushrooms, chopped fine
1/4 cup Parmesan cheese, grated
Salt and Pepper

On medium high heat, add ground pork to saute pan.  After about 5 minutes of cooking, add mushrooms and turn the heat up to high.  Season with salt and pepper.  Stir occasionally.  In a separate saucepan, cook pasta according to the directions on the box.  When the pork and mushrooms are done, turn down heat to medium high and add add frozen spinach, broth and cover with a lid.  After about 5 minutes check on the pork mixture and stir if needed. Once the spinach is wilted and mixed in with the pork, remove the lid and add the sun-dried tomatoes and the Alfredo sauce.  Stir to combine.  Add more salt and pepper to taste.  Add the drained pasta to the pork mixture and mix well.  Turn off heat.  Add cheese.  Serve!

Print Recipe
Enhanced by Zemanta

Sunday, November 21, 2010

Sweet Potato Casserole


I know, some of you probably don't like sweet potatoes.  I wasn't a big fan either but then I tried this recipe and I'm a fan now - a big one.  Even my husband, who wouldn't get near them with a 10 foot pole before, will eat these.  The problem with this dish is that at Thanksgiving there is so much to eat and you never really get your fill of it.  I recommend you make this and enjoy a bowl of it just on it's own.  That's how good it is.  That's what I did for lunch today.  I enjoyed a nice helping of this casserole.  You could say it's almost like dessert and depending on how much sugar you add, it probably should be.  I cut back a bit on the sugar and didn't miss it.  In fact, I felt less guilty eating it now.  

This holiday we're headed to Southern California for Thanksgiving.  My parents live there and my brother and his family are visiting from Oregon so it will be a fun few days catching up and eating good food.  This casserole is usually on our table at Thanksgiving.  As with most families, we have our customary favorites and it just wouldn't be the same without them...especially the leftovers.

For the sweet potatoes, I baked them but you can boil them on the stove like you do when making mash potatoes.  If you bake them, just wash, poke some holes in them and place them on a baking sheet.  I set my oven at 375 degrees and tested them at an hour.  If the knife goes in really easily they're done.  If not, leave them in and check on them every 15 minutes or so.  I just think they come out even sweeter when baked.  Let them cool, peel the skin off and then mash them up with a fork or throw it all in the food processor (minus the skins). 

Sweet Potato Casserole

Topping: 
1/2 Cup Brown Sugar (if you like it sweeter, add another 1/2 cup)
1/2 Cup Flour
1 Cup chopped pecans
1/3 Stick Butter, melted            
 
Sweet Potato Mixture:
3 Cups Mashed Sweet Potatoes (about 4 sweet potatoes)
1/2 cup sugar (add an extra 1/2 cup if like it sweeter)
1/2 teaspoon salt
2 teaspoon vanilla
2 eggs, beaten
1/2 cup half and half (or evaporated milk)
4 tablespoons melted butter

For the topping, combine the brown sugar, flour, nuts and melted butter in a mixing bowl and mix until combined and crumbly.  


Preheat your oven to 350 degrees.  Combine the sweet potatoes, sugar, salt, vanilla, eggs, milk and butter in a mixing bowl and mix well (You could also do this in the food processor instead of mashing your sweet potatoes).  Pour the sweet potato mixture into a buttered baking dish. Sprinkle the top with the nut mixture.  Bake for 30 minutes.  It's best if you let it sit for 30 minutes before serving.  Serves 8.


Print Recipe


Enhanced by Zemanta

Sunday, November 14, 2010

Easy Cheesy Brussel Sprouts


It 's been a busy week.  I'm back to work full time.  I'm lucky though as I'm working from home and commuting only two days a week.  It's working out great.  The only challenge right now is figuring out how to find time to clean, cook, do Christmas shopping, run errands, see friends and relax.  I think I was off work too long and now I'm struggling to figure out how to be the perfect woman and do it all - and I don't even have kids.  My hat's off to those of you who do.
 
Last weekend, my mom, the other half of Two True Foodies, came to visit.  We trekked into the city (San Francisco) for the annual Foodbuzz Blogger Festival.  It was our first blogger experience and boy did we rough it - there was free food and drink everywhere!


We enjoyed tasting food from local restaurants in San Francisco, a cooking class with Mary Sue Milliken (who used to have a show on the food network called Two Hot Tamales), a photography class ... but the best part was meeting other food bloggers from all over the U.S.  I even met my blogger idol who inspired me to start this blog.  Her name is Heidi Swanson from 101 Cookbooks.  I was so excited to see her there that I'm sure I made a blubbering fool out of myself when I went running up to her and her man, Wayne.  Both were really, really nice and great to talk too.


My mom and I came home inspired to continue cooking, sharing and learning more so that we can share our cooking experiences with you in the best possible way.

On to my Easy Cheesy Brussel Sprouts!  I didn't grow up eating brussel sprouts, but as I got older I kept hearing about all the different ways people cooked them and curiosity got the better of me.  Of course, I don't cook them the usual way, which is by keeping them whole.  When I made them for the first time I figured that I'd be more likely to like them if I shredded them and added some yummy ingredients ... and guess what?  It worked!
  
If you're not a big fan of brussel sprouts, try this recipe.  It's really delicious and easy once you've done all the slicing.  They're similar to cabbage in that that they cook really quickly once you get them in the pan.  They also really cook down so get more than you think you need.  This recipe is full of flavor and it's a great vegetable side dish.  I think it will become one of your favorites.  Stay tuned though because next on my list is to try a similar recipe with pancetta.  How bad can that be? 
  
  
You need about 24 of these babies.


Slice them up.  Don't worry about being precise.  Just slice them any which way, but watch your fingers!


Add some olive oil (and butter if you like) and saute the brussel sprouts until you see a little browning occur and you start smelling a lovely aroma coming from them.  Add stock, put the lid on and  - voila!  In about 3-4 minutes, they're ready.  Just add the cheese and enjoy!

Easy Cheesy Brussel Sprouts

24 Brussel Sprouts or one package of Trader Joe's Brussel Sprouts, cleaned and sliced
1 tablespoon butter
1 tablespoon olive oil
1/4 vegetable or chicken stock
1/2 cup Pecorino Romano cheese, grated (you can find it by the Parmesan cheese in the grocery store).  I get a big block of it at Costco, cut it into chunks and freeze it for when I need it.
1 teaspoon salt
1/2 teaspoon pepper
Fried Onions as garnish (optional)

In a saute pan over medium heat, melt butter and add olive oil.  When hot, add sprouts to pan.  Add salt and pepper, then stir to combine.  Saute about 2-3 minutes, stirring occasionally.  When you smell them and see some browning occur, add stock and stir until combined.  Cover and turn down heat to medium/low.  After about 3-4 minutes, uncover and add cheese.  My favorite garnish is top them with some fried onions from Trader Joes.  Here's a picture of them.  You can get these at a regular grocery store too.  Serves 4.


Enhanced by Zemanta

Wednesday, November 3, 2010

Meatloaf with Feta and Sundried Tomatoes


I have been meaning to post this recipe for a while.  It's one of my favorites but I have to say it's hard to get a good picture of meatloaf.  I tried my best.  Trust me though - the picture doesn't do it justice.  It's really good.  This is one of the few meatloaf recipes I've had where I didn't reach for the ketchup.  It really holds its own with all of it's flavorful ingredients.  The feta cheese and sun-dried tomatoes really pack a punch of flavor.  I have been going through recipes lately looking for some favorite dinner recipes to share with you.  I know how hard it is to come up with something good every night of the week.  This recipe is sure to become a favorite.
 

I got this recipe from the cookbook, Giada at Home by Giada De Laurentiis.  It's great because it will work with ground chicken, beef or turkey.  I have tried both turkey and beef and each turned out great.  The picture above is made with ground beef.  Just make sure you cook the chicken and turkey meatloaf thoroughly.  The only changes I made to this recipe is that I used seasoned breadcrumbs and added some onion.


Another great thing about meatloaf is that it's great for leftovers.  You can just heat it up again in the microwave or oven, or add a slice to a sandwich.  It's great with mash potatoes but any side works with it.  One tip is to not over mix the ingredients.  Add all the ingredients to the bowl and then mix it all together using your hands.  It's much easier and fun too!  Just mix until combined.  This will keep your meatloaf tender.

Meatloaf with Feta and Sun-dried Tomatoes

1 lb. ground meat - turkey, beef or chicken
1/2 cup seasoned dried bread crumbs
1/3 cup chopped fresh flat leaf parsley
1/4 cup chopped garlic and herb marinated sun-dried tomatoes
2 garlic cloves, minced
1 small onion, chopped
1/4 cup olive oil
2 large eggs
1/2 cup crumbled feta cheese
1 1/2 teaspoon salt
1 teaspoon pepper

Preheat your oven to 350 degrees.  Spray a 9x5 inch loaf pan with non-stick cooking spray.  

In a large bowl, mix together all the ingredients until just combined.  Place into loaf pan.  If you're using chicken or turkey, cook until the internal temperature registers 165 degrees 40-45 minutes.  My beef meatloaf took 45 minutes.  Remove from oven and let it rest for 5-10 minutes.  If there is any fat on top, use a paper towel to remove.  Slice and serve.  Serves 4.

Adapted from Giada at Home
Print Recipe
Enhanced by Zemanta

Monday, October 25, 2010

Breakfast Muffins


I love muffins so you'll probably see a few muffin recipes posted here.  Obviously they're not something I eat every morning but once in awhile it's a nice treat.  In August, I visited my brother and his family in Oregon.  Cooking is one of our family's favorite things to do when we're together.  We dig out our favorite recipes as well as add some new ones each time we visit.  We now have extra help in the kitchen from my niece and nephew, ages 9 and 6.  They're both little chefs in the making.  We had some delicious strawberries and blueberries leftover from earlier in the week.  This muffin recipe seemed like a good way to use them up.  
 
  
We made these muffins when the strawberries were super sweet.  We decided to combine strawberries and blueberries, but you can do what you like.  We found that these muffins only got better with time so don't worry if you can't eat them all in one sitting!

  
This is a Martha Stewart recipe and we pretty much kept to the recipe except that we didn't put the muffin icing on top.  I figured they had enough sugar.  I have included the icing recipe below in case you want to use it.


Breakfast Muffins

10 tablespoons unsalted butter, melted
1 3/4 cups all-purpose flour
1 tablespoon baking powder
1 1/4 teaspoons cinnamon
1/4 teaspoon salt
1/2 vanilla bean, split and scraped or 1 teaspoon of vanilla extract
2/3 cup sugar
2/3 cup milk, room temperature
1 large egg, room temperature
1 1/4 cups fruit

Preheat your oven to 400 degrees.  

Spray a muffin pan with non-stick cooking spray.  Combine flour, baking powder, cinnamon and salt in a bowl.  Whisk to combine.

In another mixing bowl, combine butter, vanilla, milk, sugar and egg.  Mix to combine.  Fold butter mixture and fruit into flour mixture - the less you mix the better.

Spoon 1/4 cup of batter into each cup.  Top with 2 tablespoons of streusel on top of each one.  Bake for 15-17 minutes.  Let cool for 15-20 minutes before removing from pan.  Transfer to a wire rack.  When completely cool, drizzle with icing if you'd like.  Makes 1 dozen

Streusel Topping

5 tablespoons unsalted butter, melted
2/3 cup all-purpose flour
2/3 cup confectioners' sugar
1/4 teaspoon cinnamon
Pinch of salt

Combine all ingredients in a medium bowl.  Use your fingers to mix until mixture is moist and crumbly.

Muffin Icing

2 tablespoons freshly squeezed lemon juice
1 cup confectioners' sugar
Combine ingredients in a bowl and mix until mixture is smooth.  Drizzle over muffins.

Adapted from Martha Stewart Living Annual Recipes, 2003
Print Recipe
Enhanced by Zemanta

Monday, October 18, 2010

Peach Freezer Jam


Come on, you deserve a treat in the morning.  You have a long day of work (or play) ahead and a simple breakfast of buttered toast with peach jam is sure you get you started right.  My grandmother always had strawberry freezer jam on the table when we would visit.  It was so good on buttered toast.  The strawberry juice melts into the bread and mixes with the butter.  Every bite is warm, buttery, strawberry delicious.  Anyway, back to the peaches.  I wanted these peaches to last forever they were so good.  In my attempt to immortalize them, I made jam.  Easy jam.  This takes less than an hour and there is no fancy canning technique required.


My mom used to serve us peaches with a little milk and sugar when we were growing up.  It's an easy treat and really good!  As you can tell, I like peaches.


I debated on whether to post this now since it may be too late for you to get peaches at the market (they had some had Costco over the weekend - so maybe not) but the good thing about this recipe is that you can use any kind of fruit and if you do want to try peaches, just get a bag of frozen peaches.


The great advantage to making your own jam is that you control what ingredients are used like how much sugar.  I used very little in this recipe because the peaches were so sweet.  It's up to you though, if you like it sweeter, add more to your jam.
  
Peach Freezer Jam

2 lbs or 3 cups peaches, peeled and sliced
1/2 cup sugar (the original recipe calls for 4 1/2 cups so feel free to add more if you like)
1 box of Sure Jell or Fruit Pectin
2 tablespoons lemon juice

In a large bowl, mash peaches with a potato masher or fork to desired consistency.  Add sugar to peaches and stir well.  Set aside so sugar can dissolve.

In a sauce pan, add 3/4 cup of water and fruit pectin.  Bring to a boil while stirring constantly.  Boil for one minute.  Add to peaches and stir well until sugar is dissolved.

Pour into clean 8 oz jars (or plastic containers) and leave 1/2 inch space at the top.  Use a damp paper towel to wipe around the rim and sides of jars to remove any residue.  Place lids on jars and let the jars sit for 24 hours at room temperature.  When done, place in the freezer until ready to use.  Store opened jars in the fridge.  

Sometimes the boxes of Fruit Pectin have recipes for freezer jam.  Feel free to follow that recipe if different than mine.  They are usually good too. 

Adapted from the website: Southern Plate
Print Recipe

Sunday, October 10, 2010

Crab Bites


Talk about a tasty treat.  These crab bites will leave you craving more.  I was planning a dinner party early last week and was looking for an appetizer that would be easy and really good.  I found this recipe on All Recipes.  I modified it a bit and I'm very happy with the results.  These are everything you could want in an appetizer - warm, soft, cheesy, crabby and melt in your mouth good.   If you like crab and cheese, you should definitely plan to make these soon! 


I know some people say you shouldn't put cheese on seafood but my motto is the more flavor the better and how can anything with cheese not taste better.  The original recipe calls for biscuit dough as the crust but I thought crescent roll dough would make these lighter and more "melt in your mouth."  

I made these last week for my parents-in-law.  They were here visiting amongst the craziness of finalizing a new job and wrapping up some other projects.  We had a busy week entertaining, visiting the botanical gardens in Berkeley, shopping (such a chore), and just catching up.  We had a great visit and we wished them well yesterday as they headed off for a 23 day cruise through the Panama Canal.  Oh, the retired life.  One can only hope that we will someday enjoy playing and traveling world as they are. 

A few tips for you on these.  You can make the filling ahead of time and just leave it in the refrigerator until about an hour before you guests arrive.  Then put everything together and bake.  This way they'll be nice and warm when you're ready to serve them. 

Crab Bites 

2 (8oz) packages refrigerated crescent roll dough
1 (8oz) package cream cheese, softened
1 (6oz) can crab meat, drained
2 tablespoons mayonnaise
2 tablespoons Parmesan cheese, grated
1/2 cup sharp cheddar cheese, grated
2 tablespoons green onion, diced
1 teaspoon Worcestershire sauce
1 pinch paprika

Preheat your oven to 375 degrees.  Lightly spray a mini muffin pan with non-stick cooking spray.  Mix the cream cheese, mayo, Parmesan, cheddar, green onion and Worcestershire sauce in a medium bowl.  Slowly fold in the crab meat.  Refrigerate until ready to use.

Unroll 1 of the 2 sections of crescent roll dough.  Seal the seams together with your fingers.  If you have a rolling pin, it works to roll it out a bit (not necessary though).  Cut circles using a can that measures 3 inches or a circle shaped cutter.  Press each one into a mini muffin hole until covering bottoms and sides.  This doesn't need to be perfect.  Add a teaspoon of mix to each one and sprinkle with paprika.

Bake for 15-20 minutes or until brown.  Makes 24 bites. 

Adapted from All Recipes

Wednesday, October 6, 2010

Pumpkin Bread with Cinnamon Honey Butter


It's feeling like fall outside!  A week ago today it was 103 degrees.  Today it's 62 degrees and cloudy.  It certainly isn't cold, but for us in California it's feeling pretty chilly compared to what we're used to.   Obviously with the cooler weather, I start thinking about all the fun fall dishes I can make.  One of my favorite things is pumpkin in the fall.  I love a good Pumpkin Bread - or muffin or pie.
  
If you're looking for something that will give you that spicy, sweet smell floating through your house to put you in the mood for fall, give this pumpkin bread a try.  It's great for breakfast, snacking or even to give as a gift.  The Cinnamon Honey Butter puts it over the top.


I tried a few different pumpkin bread recipes and settled on this one.  My husband and I did a taste test this morning (rough job!) and this one won out.  It's very light and moist with lots of flavor.  I don't make mine really sweet so feel free to add more sugar to the batter if you like yours sweeter.  Once the bread is cool, if you don't plan to eat it all in one sitting, just slice it up and put it in the freezer.  That way you can pull a slice (or two) out when you need one.

Pumpkin Bread

3 cups all-purpose flour
1 teaspoon cloves
2 teaspoon cinnamon
1 teaspoon ground nutmeg
1/2 teaspoon salt
1 teaspoon baking soda
1/2 teaspoon baking powder
1 1/2 cups sugar
1 cup butter, really soft
3 large eggs
1 (15 oz) can of pure pumpkin
1/2 cup chopped pecans (optional)

Preheat oven to 350 degrees.  Spray two loaf pans with nonstick spray.  In a bowl, mix the flour, spices, salt, baking soda, baking powder and nuts.  In another bowl, mix the sugar, butter and eggs on medium speed for about two minutes or until fluffy.  Add the pumpkin and mix well.  Add the flour to the wet mixture in three batches until it is just incorporated - don't over mix.  Pour batter into prepared pans.  Bake for one hour or until a knife comes out clean and the top is golden.

Printed Recipe 

Cinnamon Honey Butter

1/4 pound unsalted butter, at room temperature
3 tablespoons honey
1/4 teaspoon ground cinnamon
1/8 teaspoon salt

Combine the butter, honey, cinnamon and salt and mix well.  Serve at room temperature but it can be stored in the refrigerator.
  
Adapted from Barefoot Contessa Parties
Printed Recipe 

Sunday, September 26, 2010

Crustless Spinach Quiche


Quiche for me has always been a sort of comfort food.  With its buttery crust and flavorful egg mixture, it's always a treat.  But why should it only be a treat?  Quiche is so versatile and easy to make.  You can make it low carb, low fat or both - depending on what you like.  You can whip it up in a matter of minutes and serve it with a salad and in an hour, you'll have a great meal on the table.  Quiche's are also a great way to hide vegetables from husbands children.  If you chop them small enough, they'll be so unrecognizable that they'll only add flavor and nothing else but gratitude for serving a very tasty dish.


This quiche came about because I was having a dear friend over for a birthday lunch.  I wanted to serve something special but obviously something that wouldn't cause us to regret it the next day.  Not to mention, that there is always dessert on a birthday.  I found this recipe going through my very full basket of recipes and decided to make some changes to it.  First, I made it crust-less to save some carbs.  I also thought it would be fun to make individual quiches.  I added some pancetta because bacon makes everything better.  I also added half-n-half instead of milk to make it a bit creamier.  Feel free to do what you like.


Crust-less Spinach Quiche 

6 oz diced Pancetta (or 1 package of Trader Joe's diced Pancetta)
1/4 cup butter
1 small onion, chopped
3 cloves garlic, chopped
1 cup chopped fresh mushrooms
1 (10oz) package frozen, chopped spinach, thawed and squeezed dry
1 (6 oz) package herb and garlic feta cheese, crumbled
1 cup of shredded sharp cheddar cheese, grated
4 eggs, beaten
1 cup half-n-half
Salt and pepper to taste

Preheat your oven to 375 degrees.  In a medium skillet, add pancetta and cook over medium heat until starting to brown.  Add butter, garlic, onion and mushrooms.  Cook until just soft.  Add chopped spinach and turn heat down to low.  Make sure to season each layer with salt and pepper.  Add feta and 1/2 cup of the cheddar cheese.  Stir to combine well.

In a mixing bowl, add eggs and half-n-half.  Season mixture with salt and pepper.  Mix well.

In a large muffin pan (makes 8 large size muffins - you can use a regular muffin pan or even a pie plate), add a spoonful of the veggie mixture to each cup.  Then fill each cup with the egg mixture.  Should be about 3/4 full.  Sprinkle with the remaining 1/2 cup of cheddar.  Bake for 30 minutes or until set in the center.  If you make a regular quiche with crust in a 9 inch pie plate, bake for 50-60 minutes.  Let them stand about 10 minutes before serving. 

Print Recipe
Enhanced by Zemanta

Sunday, September 19, 2010

Tasty Thyme Rice


I have been on a rice kick lately, trying to cut back on gluten.  Even though I tested negative for gluten allergies, I actually feel better eating gluten free when I can.  I know it certainly helps when it comes to weight control but that's another whole blog.


In my desperate quest to come up with something different than plain rice, I remembered this recipe.  It actually comes from the other half of Two True Foodies, the cook that taught and inspired me in the kitchen, my mom.  She made this recipe for me about 12 years ago when I had just moved into my very own apartment and was starting to really experiment in the kitchen.


I know it doesn't sound very exciting but if you like rice and eat a lot of it or want to change up your potato routine, this is a really good, tasty recipe.  It's very flavorful and goes well with less flavored meats, like fish, chicken or even a steak.  I served it with a piece of sole flavored with lemon.  It also has ingredients that you probably already have on hand.  

Tasty Thyme Rice

1 cup Jasmine or Basmatti Rice 
1/2 large onion, chopped
1 tablespoon butter
1 tablespoon olive oil
1 teaspoon dried thyme
1 1/2 teaspoons salt
1/2 teaspoon pepper
1 3/4 cup chicken stock (or vegetable stock)

In a medium saucepan over medium heat, add butter and olive oil and once the butter melts, add onion and stir to combine.  Let the onion cook for about 2 minutes.  Add dried thyme (rub together in your fingers as you add to release the oils in the thyme), salt, pepper and cook another minute.  Add rice and stir to combine.  Add stock and bring the mixture to a boil over high heat.  Once the rice is boiling, cover and reduce heat to a simmer.  Cook for 20 minutes.  Remove from heat and let sit for 5 minutes.  Fluff with fork and serve hot.  

Tuesday, September 14, 2010

Pear Galette


It's that time a year again when you see all the Halloween decorations come out in the stores, the kids go back to school and there's a different feel to the air.  I'm sitting here thinking about how I would describe that feeling but I think you know what I mean.  It's the season the landscape changes to beautiful orange, browns and golds and you starting seeing leaves floating through the air.  I think the first sign of fall I have seen is the many kinds of pears showing up in the market and on my pear tree.  Unfortunately, they all seem to ripen at exactly the same time.   Usually I eat a few and give away most of them.  This year I thought I'd actually do something with them and I'm so glad I did.


I started thinking about a Pear Crisp or pears cooked down served over ice cream but then I came across this Martha Stewart recipe for a Pear Galette.  I had never made a galette so it was intriguing and the recipe seemed simple enough. The first step is making the Pate Brisee.

A Pate Brisee sounds fancier than it is.  Most of us call it a pie crust.  It's basically flour, salt, sugar, cold butter and ice water mixed until a dough just forms.  The key is not over mixing the dough.  You want it just holding together so it will be nice and flaky!

Look at all that yummy butter.  How bad can it be, right?  Make sure it's cold and that you cut it into cubes so it will mix more evenly.


See how the dough is just starting to come together.  This is where you STOP mixing.  It'll be hard to stop but pinch some crumbs together and if they stay together - your done.

Divide the dough in half and wrap in plastic wrap.  The dough needs to be chilled at least an hour.  One must be patient to create a masterpiece.

Now for the pears.  Unfortunately I spaced when it came to taking pictures of the pears.  So this is it.  But it's simple at this point and the full recipe is listed below.  Keep in mind, you could use any fruit in this galette so give it a try.  It's delicious with a scoop of ice cream or a dollop of whipped cream.

Pate Brisee

2 1/2 cups all purpose flour
1 teaspoon course salt
1 teaspoon sugar
1 cup (2 sticks) chilled unsalted butter, cut into pieces
1/4-1/2 cup ice water

Place the first 3 ingredients in a food processor.  Pulse to combine.  Add the chilled butter and pulse until resembles crumbs.  Slowly drizzle water in until dough starts clumping together.  Stop and press crumbs together.  If they stick together, it's done.  Do not process longer than 30 seconds.

Turn the dough out on a floured surface.  Bring it together a little bit but only so you can divide it in half and wrap each half in plastic wrap.  Refrigerate for at least an hour before using.  Makes two 8-10 inch single crust pies or one 8-10 inch double pie crust.  For a galette, it makes two large or 3 smaller galettes.  This is great to make ahead and store in the freezer for last minute desserts.

Adapted from Martha Stewart Living
Print Recipe

Pear Galette


1/2 recipe of Pate Brisee
1 tablespoon cornstarch
1/4 cup granulated sugar
Pinch of salt
4 large ripe pears, peeled (I used Bartlett)
1 tablespoon unsalted butter, cut into small pieces
1 large egg, beaten
Sanding sugar
3 tablespoon apricot jam

Line with parchment or spray a baking sheet with non-stick spray.  Roll out dough on a floured surface to about a 1/4 inch thick and in a circle.  Place rolled out dough on baking sheet.  Refrigerate until ready to use.


Preheat your oven to 400 degrees.  Mix together cornstarch, cinnamon, sugar and salt.  Cut up pears in bite size pieces.  Mix cornstarch mixture with pears in a large bowl.  Mound pear mixture in center of rolled out dough.  Leaving at least a 3 inch border all the way around.  Fold dough over pear mixture, overlapping all the way around.  Place in the refrigerator to chill for 20-30 minutes.  

When ready, brush edges of dough with beaten egg and sprinkle with sanding sugar.  Dot top of galette with butter.  Bake until crust is golden brown and juices are bubbling, about 1 hour.  Heat apricot jam in a small saucepan or in the microwave.  Remove galette from oven and transfer to a wire rack.  Brush jam over pears.  Serve warm or at room temperature.  Serves 8.  It's great for breakfast too!