Before I get to the Date Nut Cookies, let me share with you all the delicious cookies, biscotti and brownies I received in the 2013 Great Food Blogger Cookie Swap. There's nothing like opening a package full of cookies from all over the U.S. It's really fun to see where they came from and to check out each of their blogs.
You might recall us having done the Great Food Bloggers Cookie Swap the past couple of years where money is raised for Cookies for Kids Cancer. This year the bloggers raised over $13,000! It's always a challenge to get the cookies made and out in time since we have to ship them out right after Thanksgiving. I'm always scrambling the last day to ship them but it's worth it. This year mom was here visiting me so we were able to do them together.
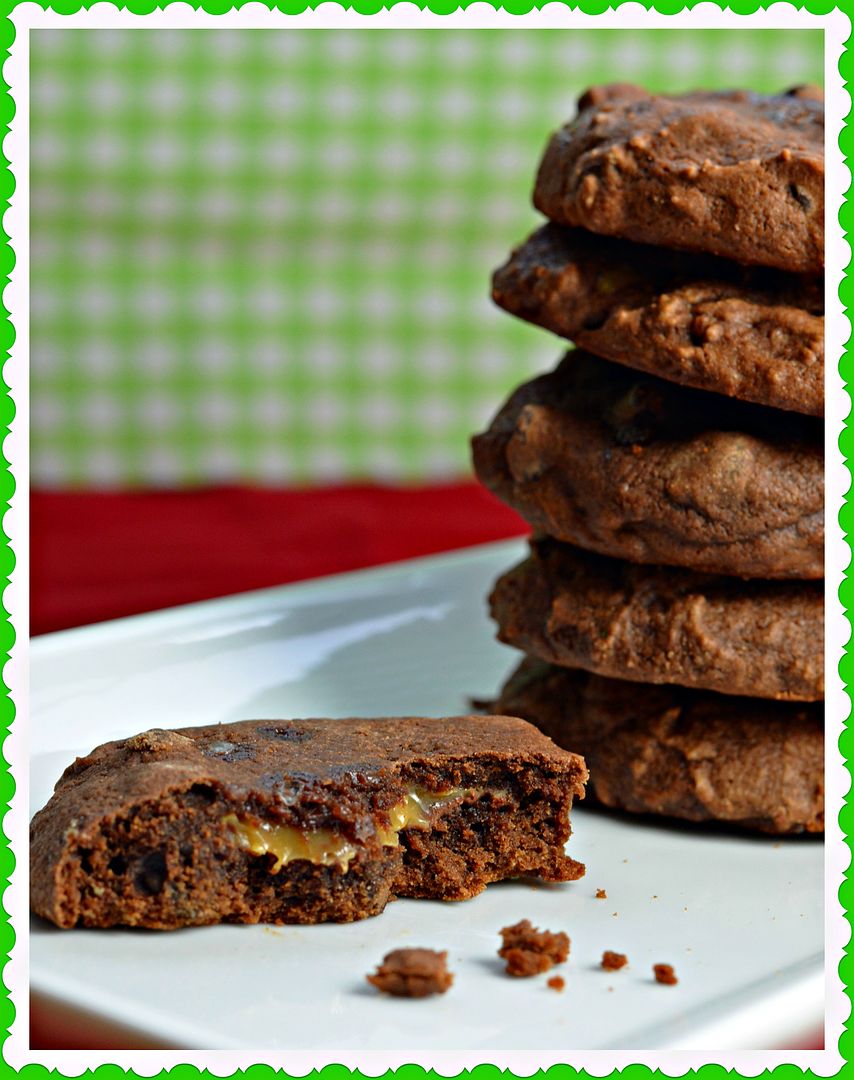
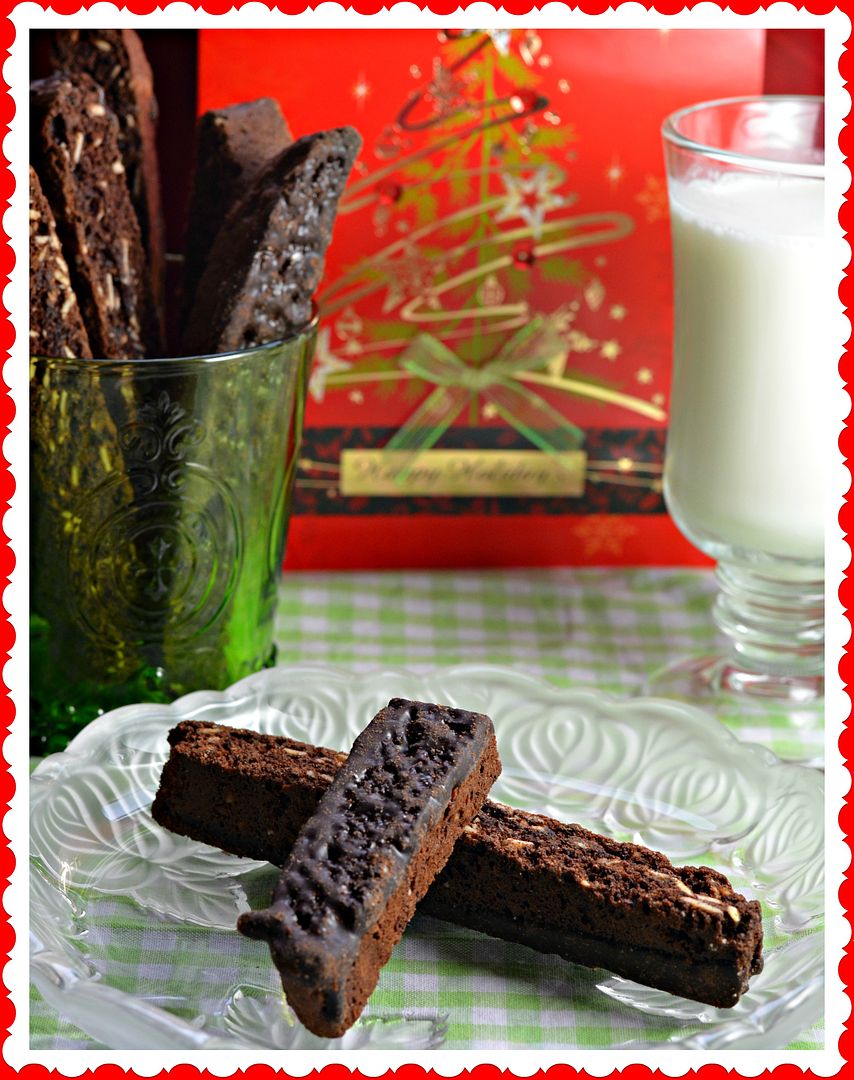
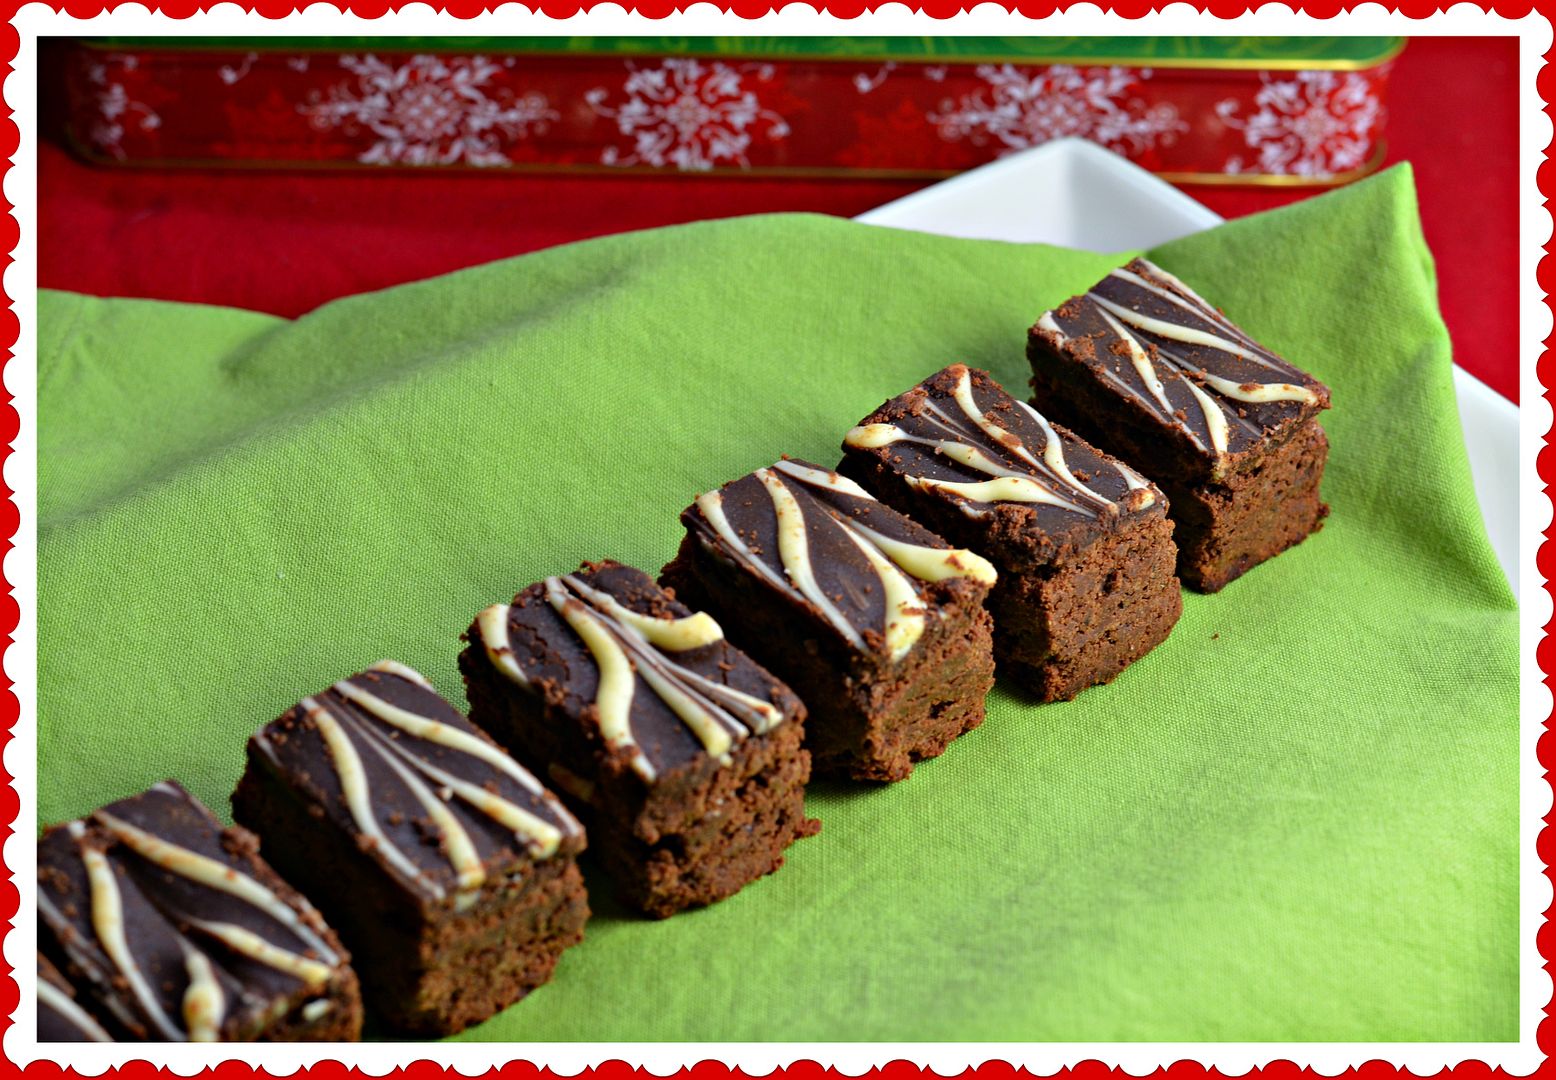
All of the goodies we received were delicious. Lots of chocolate! Below you'll find a picture of each and a link to their blog. I'm taking a photography class for fun and have to turn in a portfolio of photos this weekend. Of course I chose food. I used my new friends goodies as props as you'll see below.
Salted Caramel & Nutella Stuffed Chocolate Chip Cookies from Krystal at Ink & Frosting.
Double Chocolate Almond Biscotti with Sea Salt from Laura at Blogging Over Thyme
Peppermint Brownies from Melissa at Being a Bear
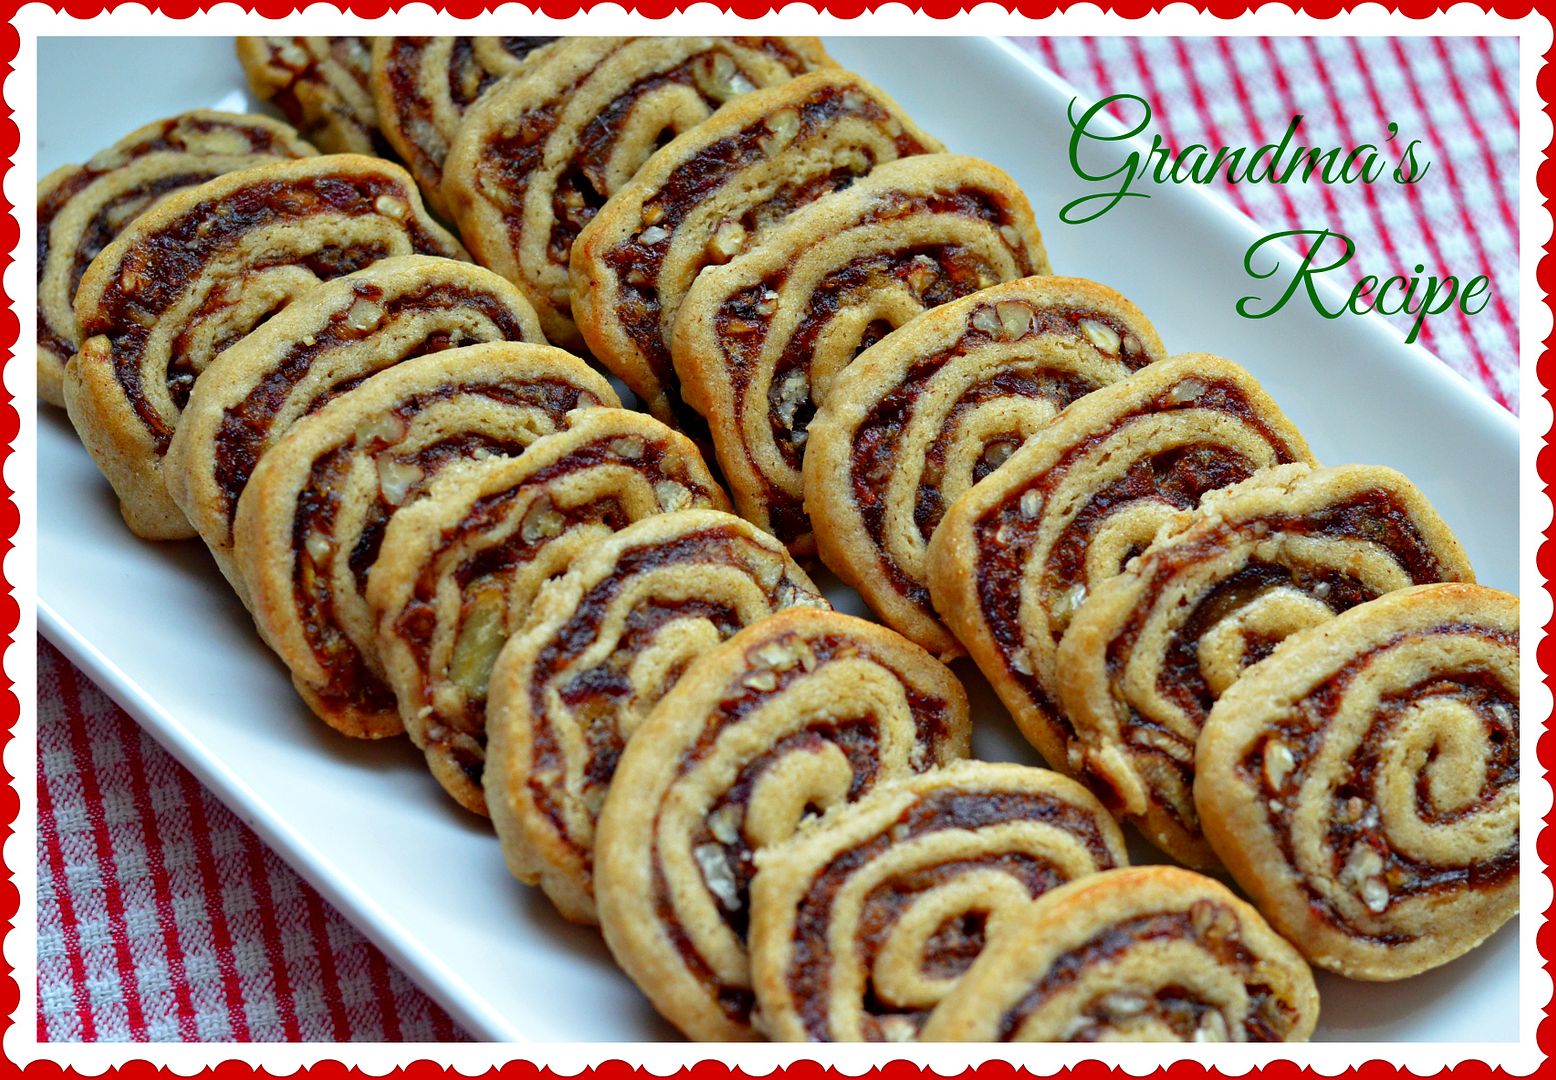
I choose my grandmother's Date Nut Cookies to send to my swap partners which were Ink Foods in Dallas, TX, Yums and Loves in Issaquah, WA, and Eat Bake Drink Cook in Washington, DC. They all have beautiful blogs.
I have very fond memories of these cookies. My grandmother always had these around at the holidays. She would usually have some in a tin or they would be in the freezer. I loved eating them right out of the freezer. They're a little crunchier but the date filling stays soft. Here's a step by step run down on how to make them.


Date Nut Cookies
Date Filling:
1 cup water
1 cup finely chopped nuts (walnuts or pecans)
2 pounds of pitted dates, chopped
1 cup of sugar
Dough:
1 teaspoon salt
3 teaspoons baking powder
4 cups flour, sifted
2 teaspoon cinnamon
10 tablespoons butter
2 teaspoons vanilla
2 eggs
2 cups sugar
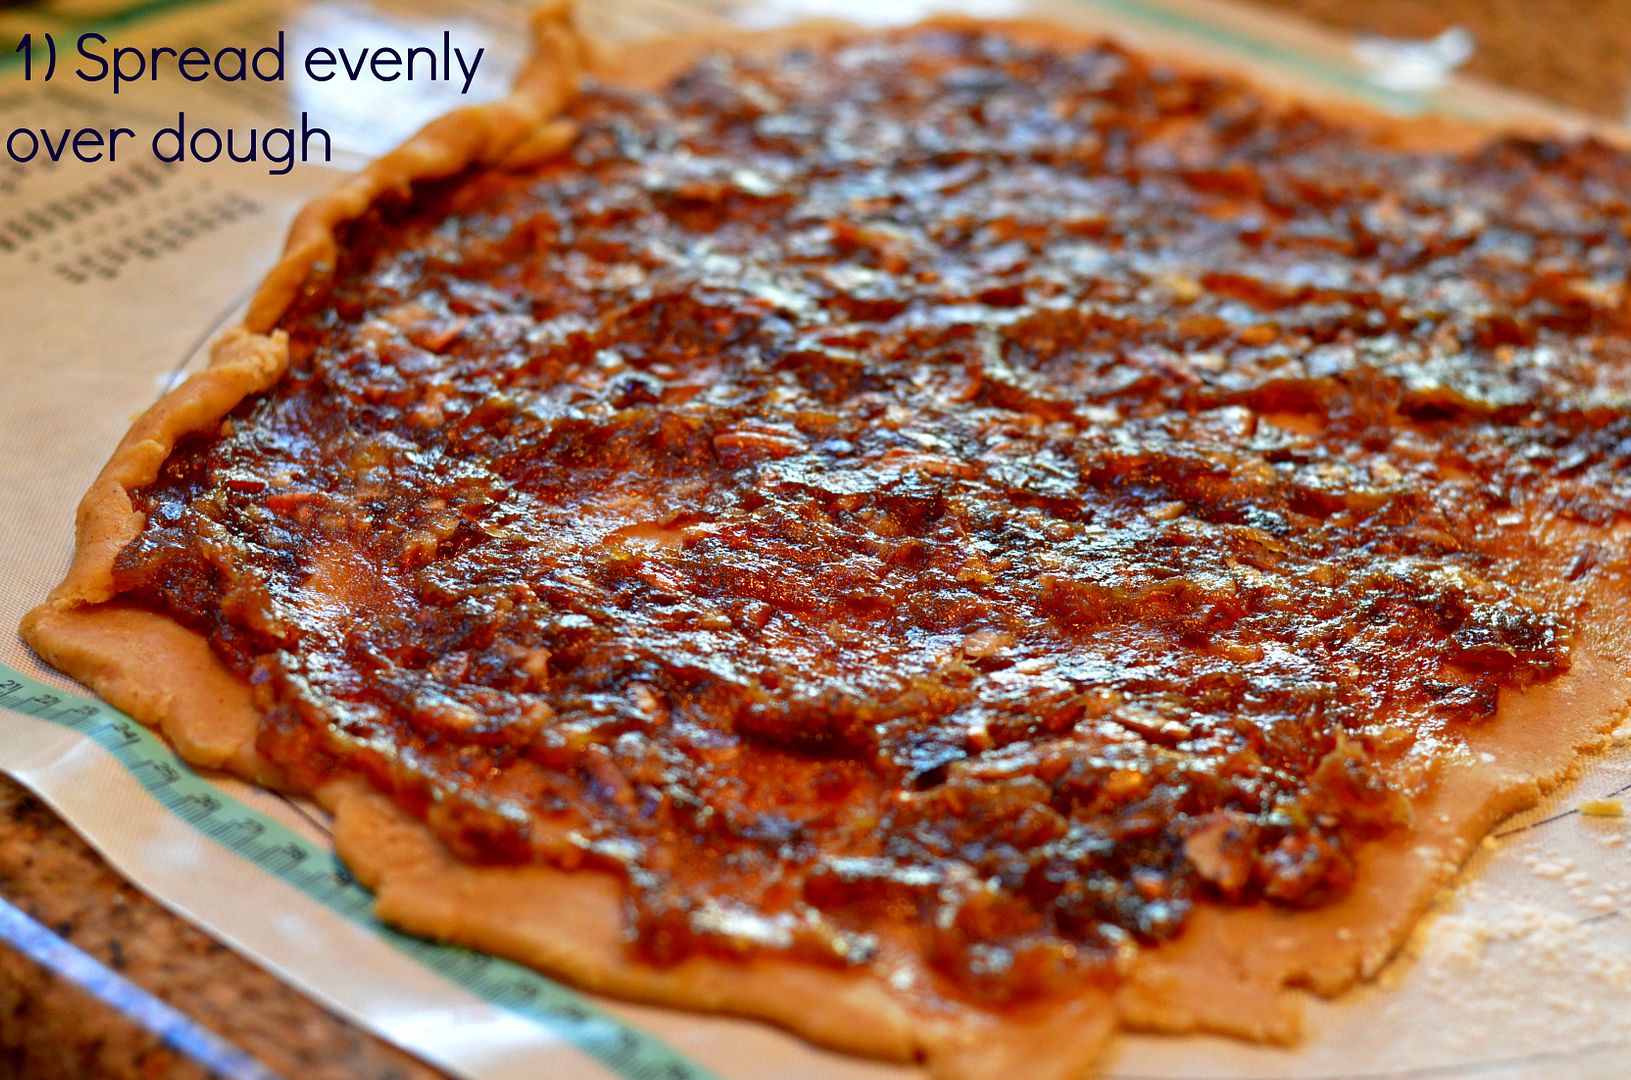
To make the filling, heat a large saucepan and add the dates, sugar, nuts and water. Stir over medium heat about 10 minutes until it all melts together and thickens.
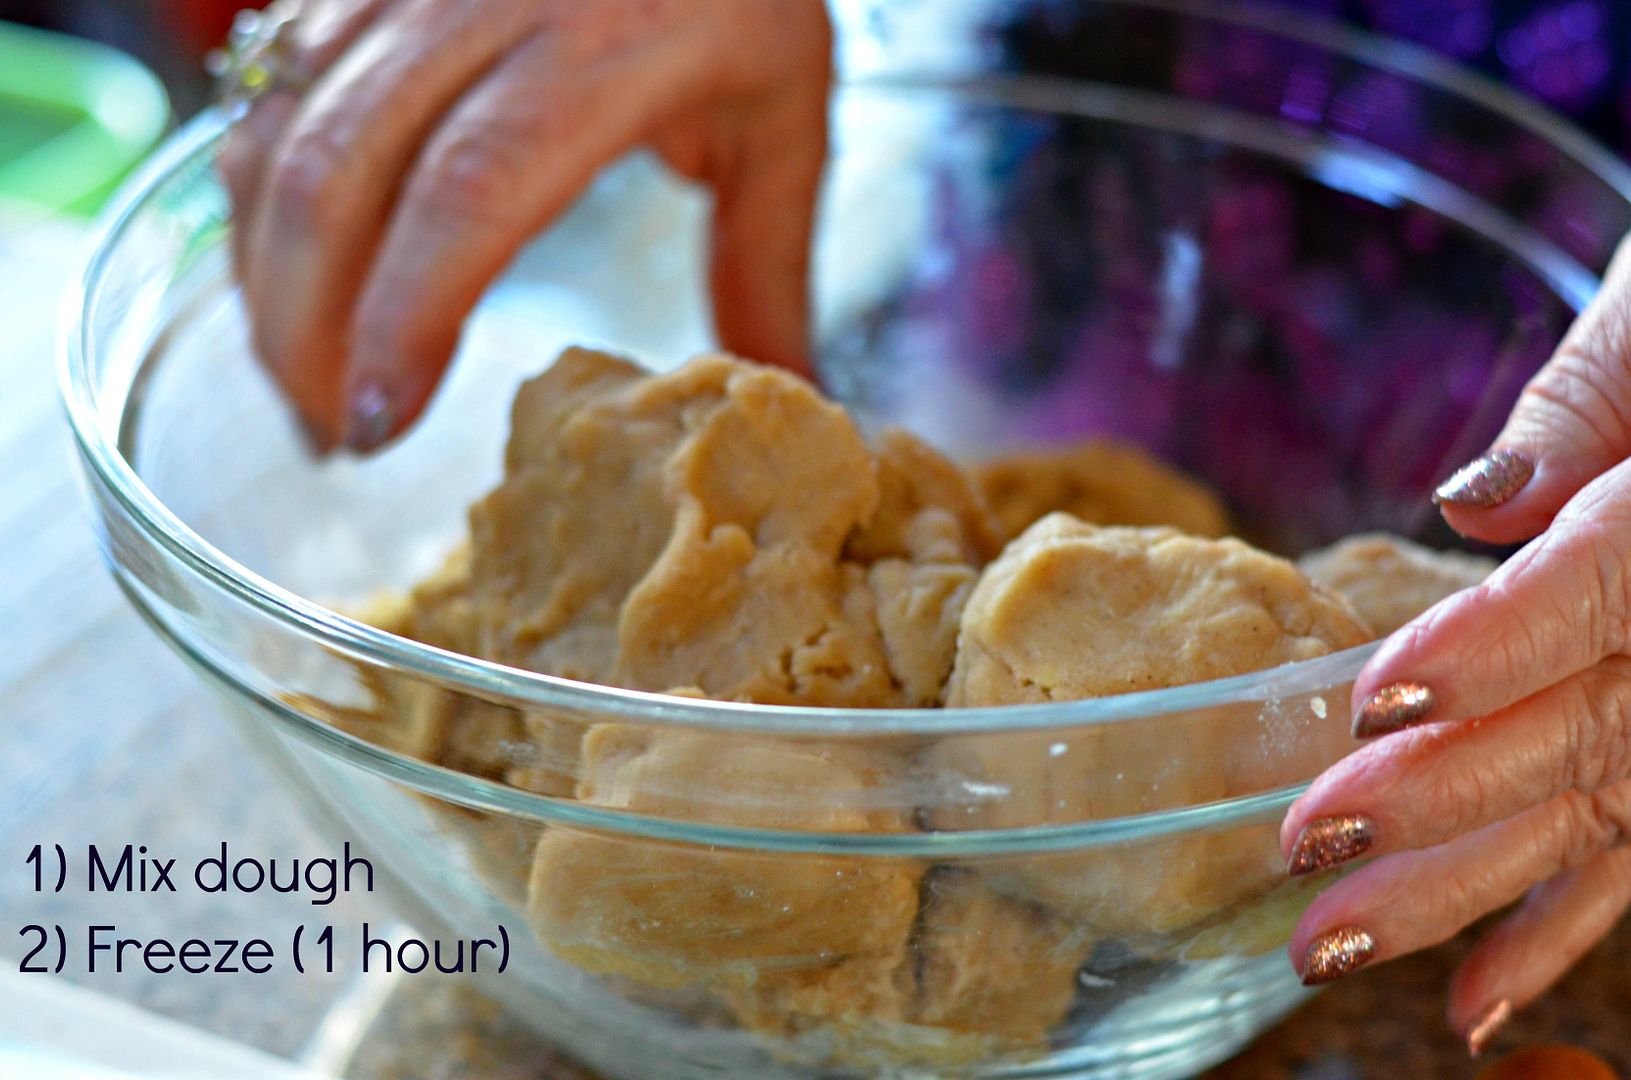
To make the dough, cream together the sugar, butter and eggs. Add vanilla. Stir together the dry ingredients - flour, cinnamon, salt and baking powder. Add dry ingredients to the egg mixture. Once it is mixed well, freeze for at least one hour. It makes a soft dough.
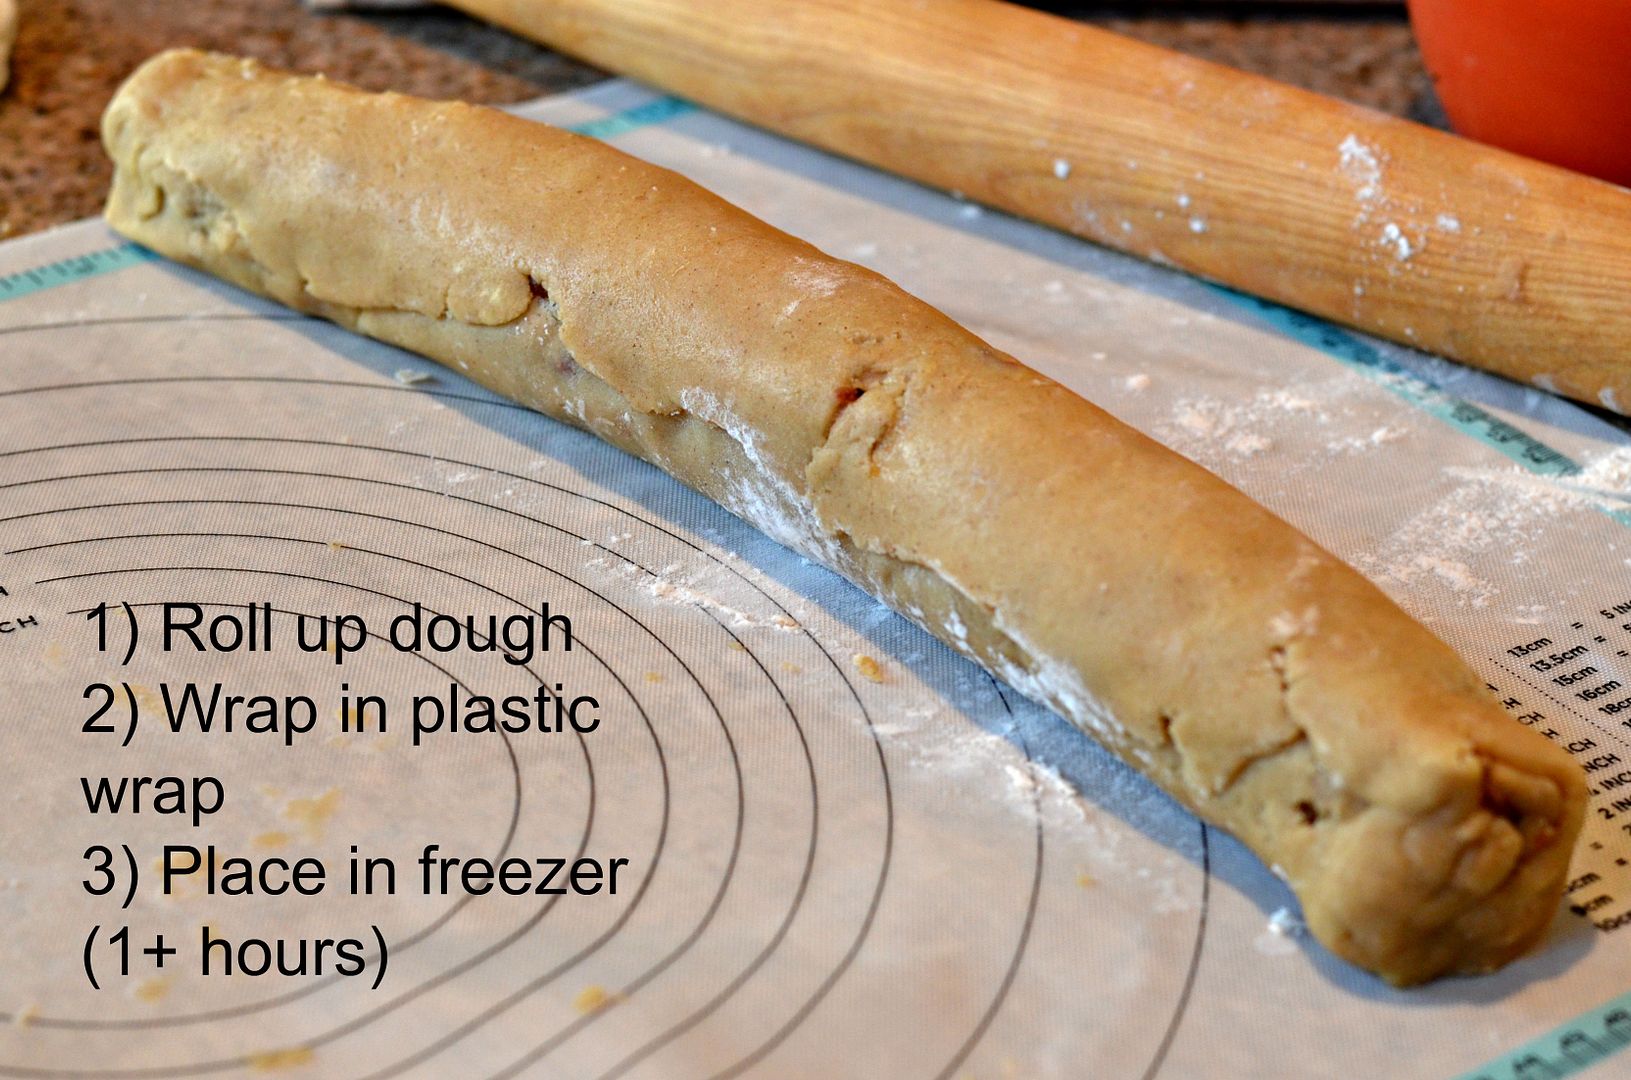
To make the cookies: split the cookie dough in quarters and take one of these quarters, put the rest back in the freezer or fridge. Roll dough into a rectangle or oval and a 1/4 inch thickness. Make sure you flour the board and rolling pin to keep it from sticking. Spread a quarter of the date mixture over the dough. Roll up the dough on the long end. Wrap in plastic wrap and place in freezer for at least an hour. Do the same with the remaining quarters of dough. When you want to make cookies, preheat oven to 375 degrees, take a roll of dough out of freezer, slice the dough in 1/4 inch thickness and place on a cookie sheet 2 inches apart. Place in oven for 8-10 minutes. The cookies should not get too brown but have a slight golden color to them when you pull them out. Cool on cookie rack. Makes ~8-10 dozen cookies. You can cut this recipe in half if you want less cookies. It's really nice to have these in the freezer though, either cooked or in a roll so that you can have/make cookies anytime you need them. Enjoy!
Print Recipe