Sunday, September 26, 2010

Crustless Spinach Quiche


Quiche for me has always been a sort of comfort food.  With its buttery crust and flavorful egg mixture, it's always a treat.  But why should it only be a treat?  Quiche is so versatile and easy to make.  You can make it low carb, low fat or both - depending on what you like.  You can whip it up in a matter of minutes and serve it with a salad and in an hour, you'll have a great meal on the table.  Quiche's are also a great way to hide vegetables from husbands children.  If you chop them small enough, they'll be so unrecognizable that they'll only add flavor and nothing else but gratitude for serving a very tasty dish.


This quiche came about because I was having a dear friend over for a birthday lunch.  I wanted to serve something special but obviously something that wouldn't cause us to regret it the next day.  Not to mention, that there is always dessert on a birthday.  I found this recipe going through my very full basket of recipes and decided to make some changes to it.  First, I made it crust-less to save some carbs.  I also thought it would be fun to make individual quiches.  I added some pancetta because bacon makes everything better.  I also added half-n-half instead of milk to make it a bit creamier.  Feel free to do what you like.


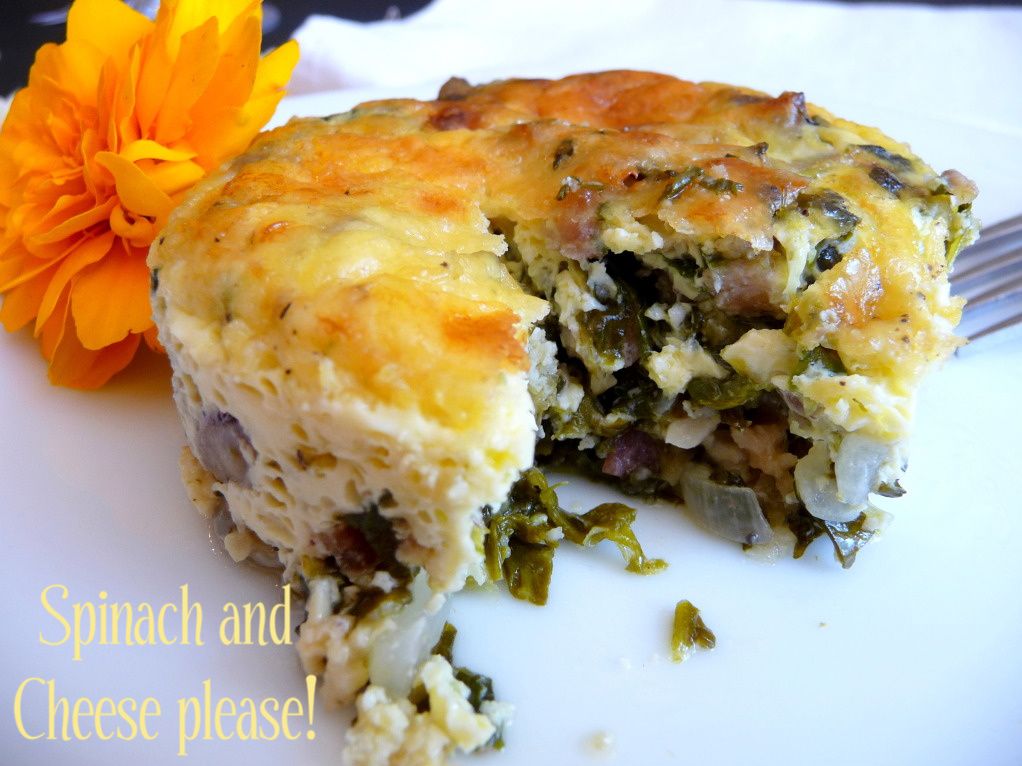
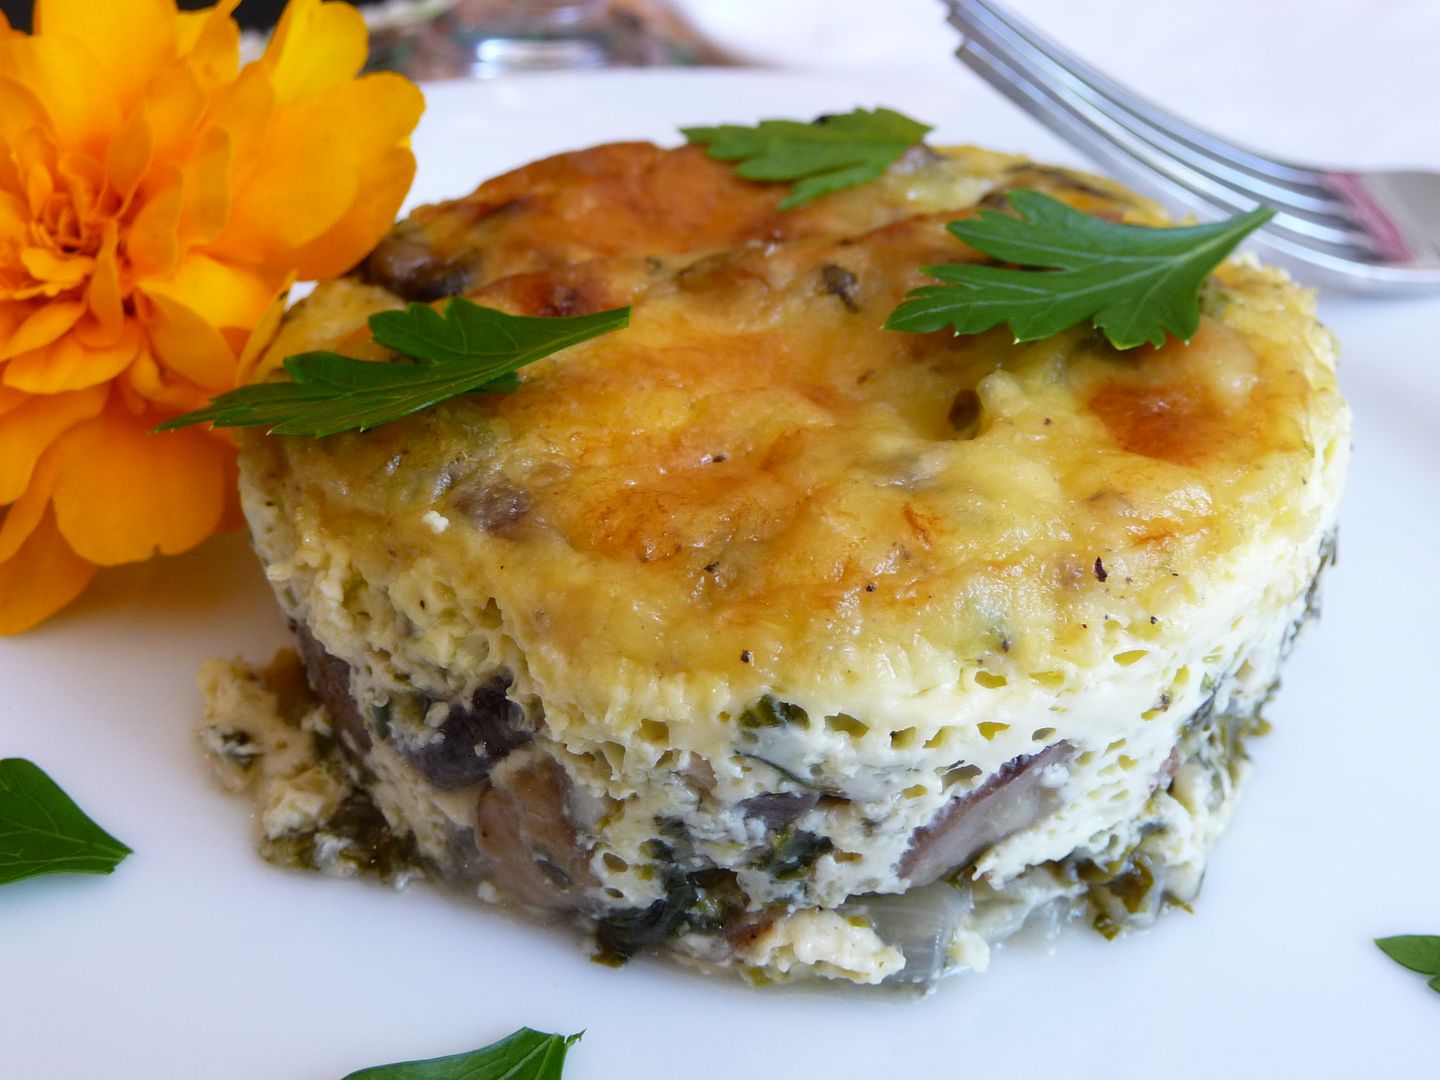
Crust-less Spinach Quiche 

6 oz diced Pancetta (or 1 package of Trader Joe's diced Pancetta)
1/4 cup butter
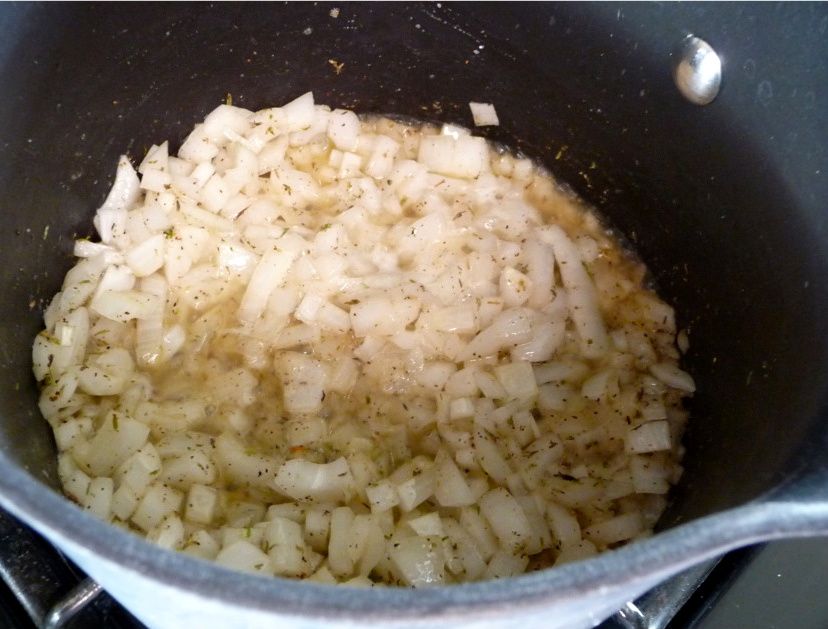
1 small onion, chopped
3 cloves garlic, chopped
1 cup chopped fresh mushrooms
1 (10oz) package frozen, chopped spinach, thawed and squeezed dry
1 (6 oz) package herb and garlic feta cheese, crumbled
1 cup of shredded sharp cheddar cheese, grated
4 eggs, beaten
1 cup half-n-half
Salt and pepper to taste

Preheat your oven to 375 degrees.  In a medium skillet, add pancetta and cook over medium heat until starting to brown.  Add butter, garlic, onion and mushrooms.  Cook until just soft.  Add chopped spinach and turn heat down to low.  Make sure to season each layer with salt and pepper.  Add feta and 1/2 cup of the cheddar cheese.  Stir to combine well.

In a mixing bowl, add eggs and half-n-half.  Season mixture with salt and pepper.  Mix well.

In a large muffin pan (makes 8 large size muffins - you can use a regular muffin pan or even a pie plate), add a spoonful of the veggie mixture to each cup.  Then fill each cup with the egg mixture.  Should be about 3/4 full.  Sprinkle with the remaining 1/2 cup of cheddar.  Bake for 30 minutes or until set in the center.  If you make a regular quiche with crust in a 9 inch pie plate, bake for 50-60 minutes.  Let them stand about 10 minutes before serving. 

Print Recipe
Enhanced by Zemanta

Sunday, September 19, 2010

Tasty Thyme Rice


I have been on a rice kick lately, trying to cut back on gluten.  Even though I tested negative for gluten allergies, I actually feel better eating gluten free when I can.  I know it certainly helps when it comes to weight control but that's another whole blog.


In my desperate quest to come up with something different than plain rice, I remembered this recipe.  It actually comes from the other half of Two True Foodies, the cook that taught and inspired me in the kitchen, my mom.  She made this recipe for me about 12 years ago when I had just moved into my very own apartment and was starting to really experiment in the kitchen.


I know it doesn't sound very exciting but if you like rice and eat a lot of it or want to change up your potato routine, this is a really good, tasty recipe.  It's very flavorful and goes well with less flavored meats, like fish, chicken or even a steak.  I served it with a piece of sole flavored with lemon.  It also has ingredients that you probably already have on hand.  

Tasty Thyme Rice

1 cup Jasmine or Basmatti Rice 
1/2 large onion, chopped
1 tablespoon butter
1 tablespoon olive oil
1 teaspoon dried thyme
1 1/2 teaspoons salt
1/2 teaspoon pepper
1 3/4 cup chicken stock (or vegetable stock)

In a medium saucepan over medium heat, add butter and olive oil and once the butter melts, add onion and stir to combine.  Let the onion cook for about 2 minutes.  Add dried thyme (rub together in your fingers as you add to release the oils in the thyme), salt, pepper and cook another minute.  Add rice and stir to combine.  Add stock and bring the mixture to a boil over high heat.  Once the rice is boiling, cover and reduce heat to a simmer.  Cook for 20 minutes.  Remove from heat and let sit for 5 minutes.  Fluff with fork and serve hot.  

Tuesday, September 14, 2010

Pear Galette


It's that time a year again when you see all the Halloween decorations come out in the stores, the kids go back to school and there's a different feel to the air.  I'm sitting here thinking about how I would describe that feeling but I think you know what I mean.  It's the season the landscape changes to beautiful orange, browns and golds and you starting seeing leaves floating through the air.  I think the first sign of fall I have seen is the many kinds of pears showing up in the market and on my pear tree.  Unfortunately, they all seem to ripen at exactly the same time.   Usually I eat a few and give away most of them.  This year I thought I'd actually do something with them and I'm so glad I did.


I started thinking about a Pear Crisp or pears cooked down served over ice cream but then I came across this Martha Stewart recipe for a Pear Galette.  I had never made a galette so it was intriguing and the recipe seemed simple enough. The first step is making the Pate Brisee.

A Pate Brisee sounds fancier than it is.  Most of us call it a pie crust.  It's basically flour, salt, sugar, cold butter and ice water mixed until a dough just forms.  The key is not over mixing the dough.  You want it just holding together so it will be nice and flaky!

Look at all that yummy butter.  How bad can it be, right?  Make sure it's cold and that you cut it into cubes so it will mix more evenly.


See how the dough is just starting to come together.  This is where you STOP mixing.  It'll be hard to stop but pinch some crumbs together and if they stay together - your done.

Divide the dough in half and wrap in plastic wrap.  The dough needs to be chilled at least an hour.  One must be patient to create a masterpiece.

Now for the pears.  Unfortunately I spaced when it came to taking pictures of the pears.  So this is it.  But it's simple at this point and the full recipe is listed below.  Keep in mind, you could use any fruit in this galette so give it a try.  It's delicious with a scoop of ice cream or a dollop of whipped cream.

Pate Brisee

2 1/2 cups all purpose flour
1 teaspoon course salt
1 teaspoon sugar
1 cup (2 sticks) chilled unsalted butter, cut into pieces
1/4-1/2 cup ice water

Place the first 3 ingredients in a food processor.  Pulse to combine.  Add the chilled butter and pulse until resembles crumbs.  Slowly drizzle water in until dough starts clumping together.  Stop and press crumbs together.  If they stick together, it's done.  Do not process longer than 30 seconds.

Turn the dough out on a floured surface.  Bring it together a little bit but only so you can divide it in half and wrap each half in plastic wrap.  Refrigerate for at least an hour before using.  Makes two 8-10 inch single crust pies or one 8-10 inch double pie crust.  For a galette, it makes two large or 3 smaller galettes.  This is great to make ahead and store in the freezer for last minute desserts.

Adapted from Martha Stewart Living
Print Recipe

Pear Galette


1/2 recipe of Pate Brisee
1 tablespoon cornstarch
1/4 cup granulated sugar
Pinch of salt
4 large ripe pears, peeled (I used Bartlett)
1 tablespoon unsalted butter, cut into small pieces
1 large egg, beaten
Sanding sugar
3 tablespoon apricot jam

Line with parchment or spray a baking sheet with non-stick spray.  Roll out dough on a floured surface to about a 1/4 inch thick and in a circle.  Place rolled out dough on baking sheet.  Refrigerate until ready to use.


Preheat your oven to 400 degrees.  Mix together cornstarch, cinnamon, sugar and salt.  Cut up pears in bite size pieces.  Mix cornstarch mixture with pears in a large bowl.  Mound pear mixture in center of rolled out dough.  Leaving at least a 3 inch border all the way around.  Fold dough over pear mixture, overlapping all the way around.  Place in the refrigerator to chill for 20-30 minutes.  

When ready, brush edges of dough with beaten egg and sprinkle with sanding sugar.  Dot top of galette with butter.  Bake until crust is golden brown and juices are bubbling, about 1 hour.  Heat apricot jam in a small saucepan or in the microwave.  Remove galette from oven and transfer to a wire rack.  Brush jam over pears.  Serve warm or at room temperature.  Serves 8.  It's great for breakfast too!

Wednesday, September 1, 2010

Perfect Potatoes for a HOT Day!


It's hot!  Too hot to turn the oven on.  If your house is like mine, when the oven goes on, the temperature in the kitchen rises at least 10 degrees.  When it's over 90 degrees outside, I head for the grill.  There's no heating up the oven, messing up the kitchen and dinner cooks while you sit on the patio and enjoy your favorite beverage.  Another tip - if you have a grillin man around, he can do most of the work for you.  Now that's my idea of enjoying a late summer evening.  This recipe is simple, fast and perfect for a hot day because it's all done on the grill! 

Here's a simple plan for a cool evening (not cooking) grilling dinner:

Step 1:  Take out what sounds good to you - steak, burgers, fish, chicken and get it ready to grill.   Meaning you could marinate it or just season it up with salt and pepper.

Step 2:  Take your favorite vegetables and cut them into 1 inch pieces.  Mix them with some olive oil, salt and pepper and if you like it, some chopped up garlic.  I usually use peppers, onion, mushrooms and sometimes zucchini.  Add them to a grill pan or wrap up in foil and set aside.  I'll do this sometime on the blog - it's one of my favorites during the summer.

Step 3:  Now get your potatoes ready and get them on the grill. They'll probably take the longest, around 40-50 minutes.  See recipe below.

Step 4:  When you have 20-30 minutes of grilling time left, add your meat/fish to the grill.  Grill to desired doneness.  If done early, just remove from grill and cover with foil to keep warm.

Step 5:  When you have 15-20 minutes of grill time left, add your vegetables to the grill.  Grill until soft (not charred).  Remove and cover with foil.

Step 6:  EAT!

There you have it.  A complete meal, all done on the grill.  And guess what? The kitchen stays cool and so do you!


Perfect Grilled Potatoes

1 lb small potatoes
2-3 cloves of garlic, sliced
2-3 tablespoon olive oil
2 tablespoons fresh herbs
Salt and pepper

Wash and clean the potatoes.  Cut in quarters, trying to keep them all a similar size.  In a bowl, add potatoes, chopped garlic, salt and pepper.  Season well.  You want them to have some flavor.  Chop up your herbs, I used rosemary and thyme, and add to potatoes.  Add olive oil and mix well.  Add enough oil so that they don't stick to the foil when cooking.  

Take two large pieces of foil and lay them on top of each other in an X.  Pile potatoes in the middle and pull up the sides of the foil and seal tightly.  Heat up grill on med/low heat.  Put foil packet of potatoes on grill.  Grill for about 50 minutes.  You can check for doneness at 40 minutes but be careful of the steam.  To check for doneness, just stick a knife or a fork in a potato and if it goes in easy with just slight resistance, they are done.  Enjoy!   Enhanced by Zemanta