Friday, August 31, 2012

Chocolate Pear Tart


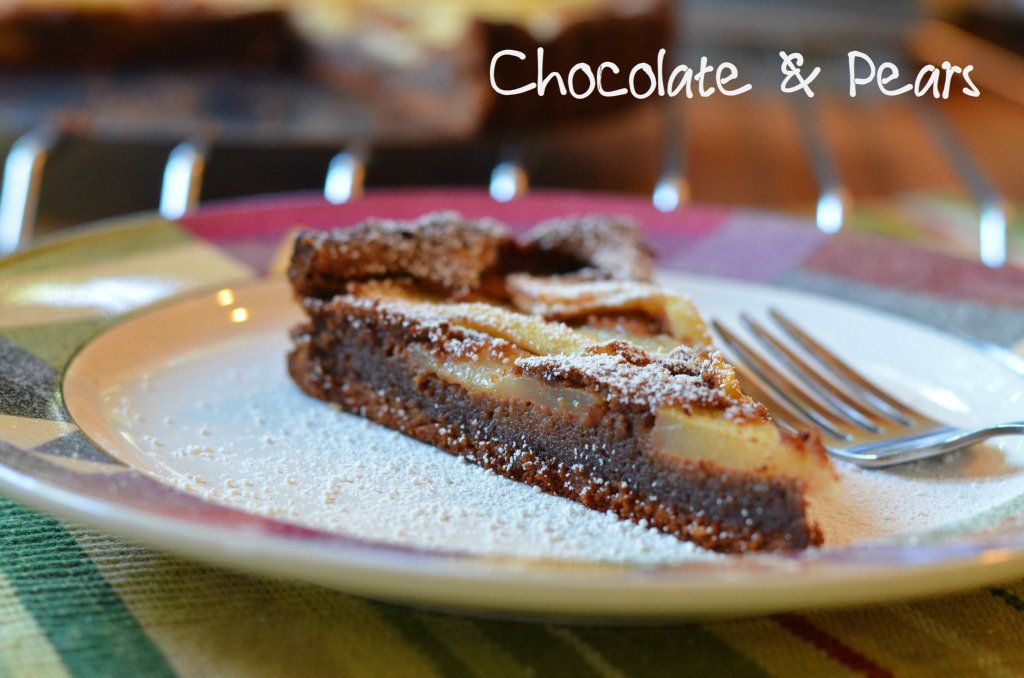
Pears are in season right now, chocolate as you know is always in season. Combine the two and wah lah...a chocolate pear tart. If you haven't had something like this before, it may seem strange, but my mom and I tried this while she was visiting and it was mouth-watering delicious. Not too sweet and the pears are soft and slightly tart which sets off the sweetness of the chocolate. There isn't any flour in it so it's a great alternative gluten free dessert.


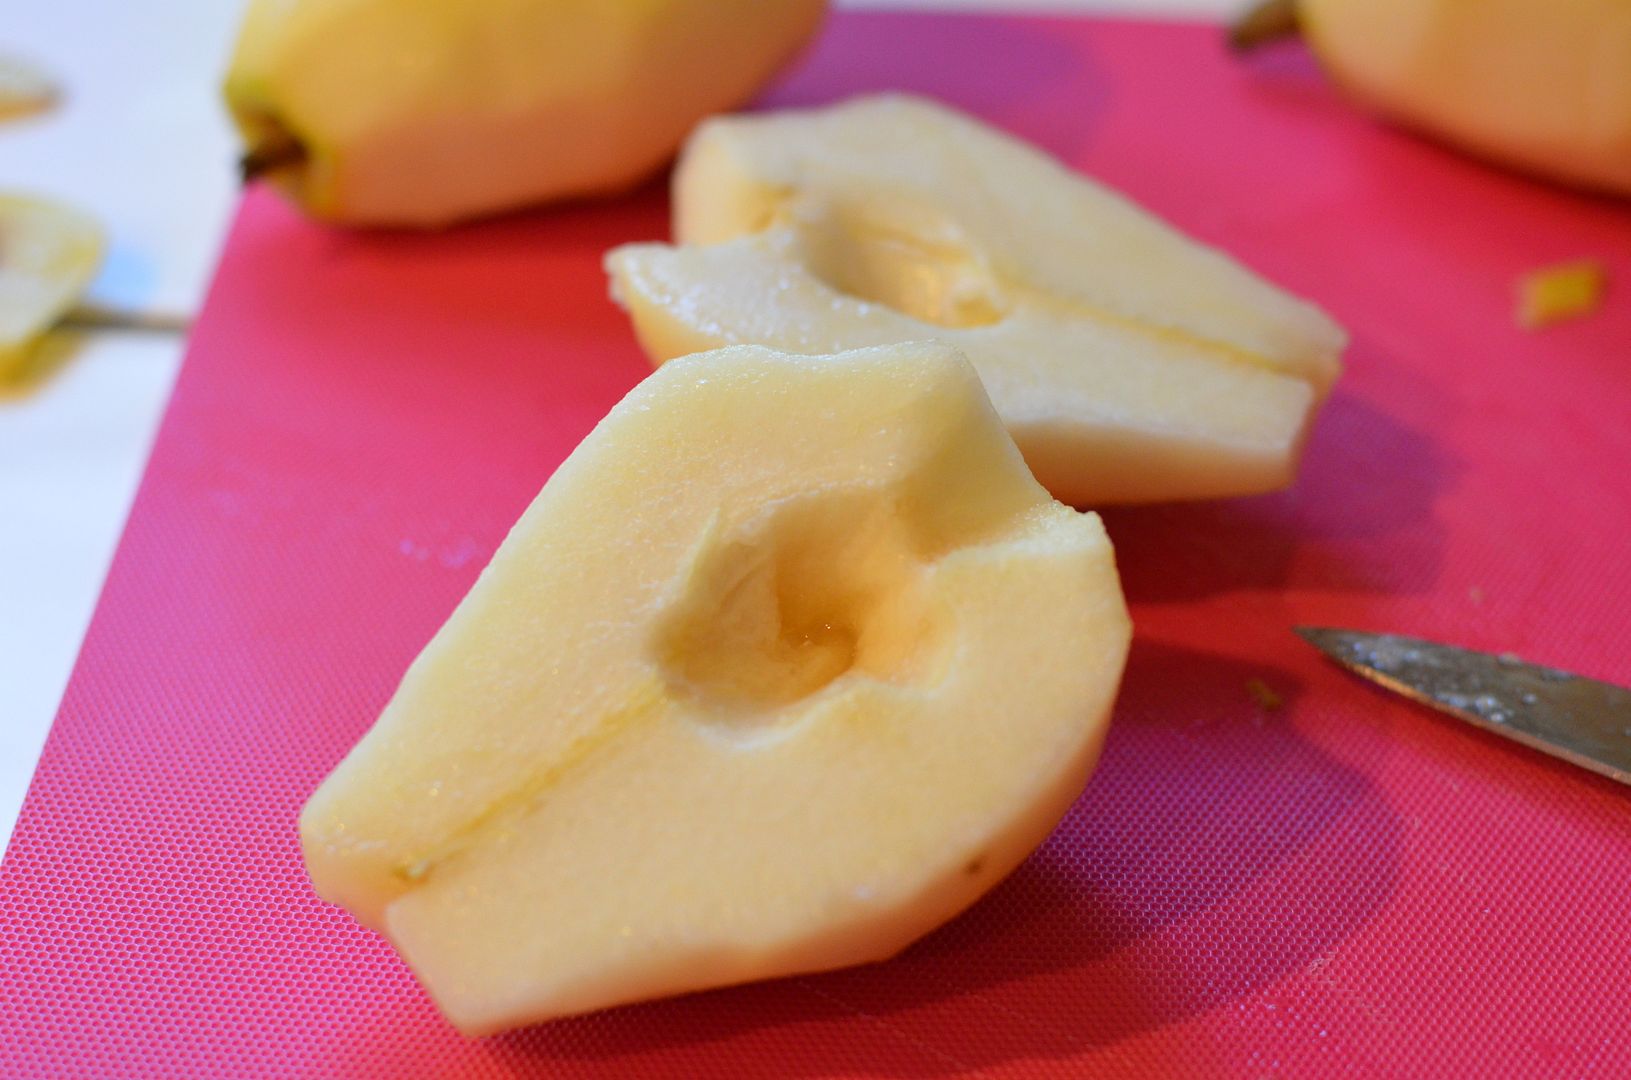
Peel and slice the pear in half. Take the core out of each half.


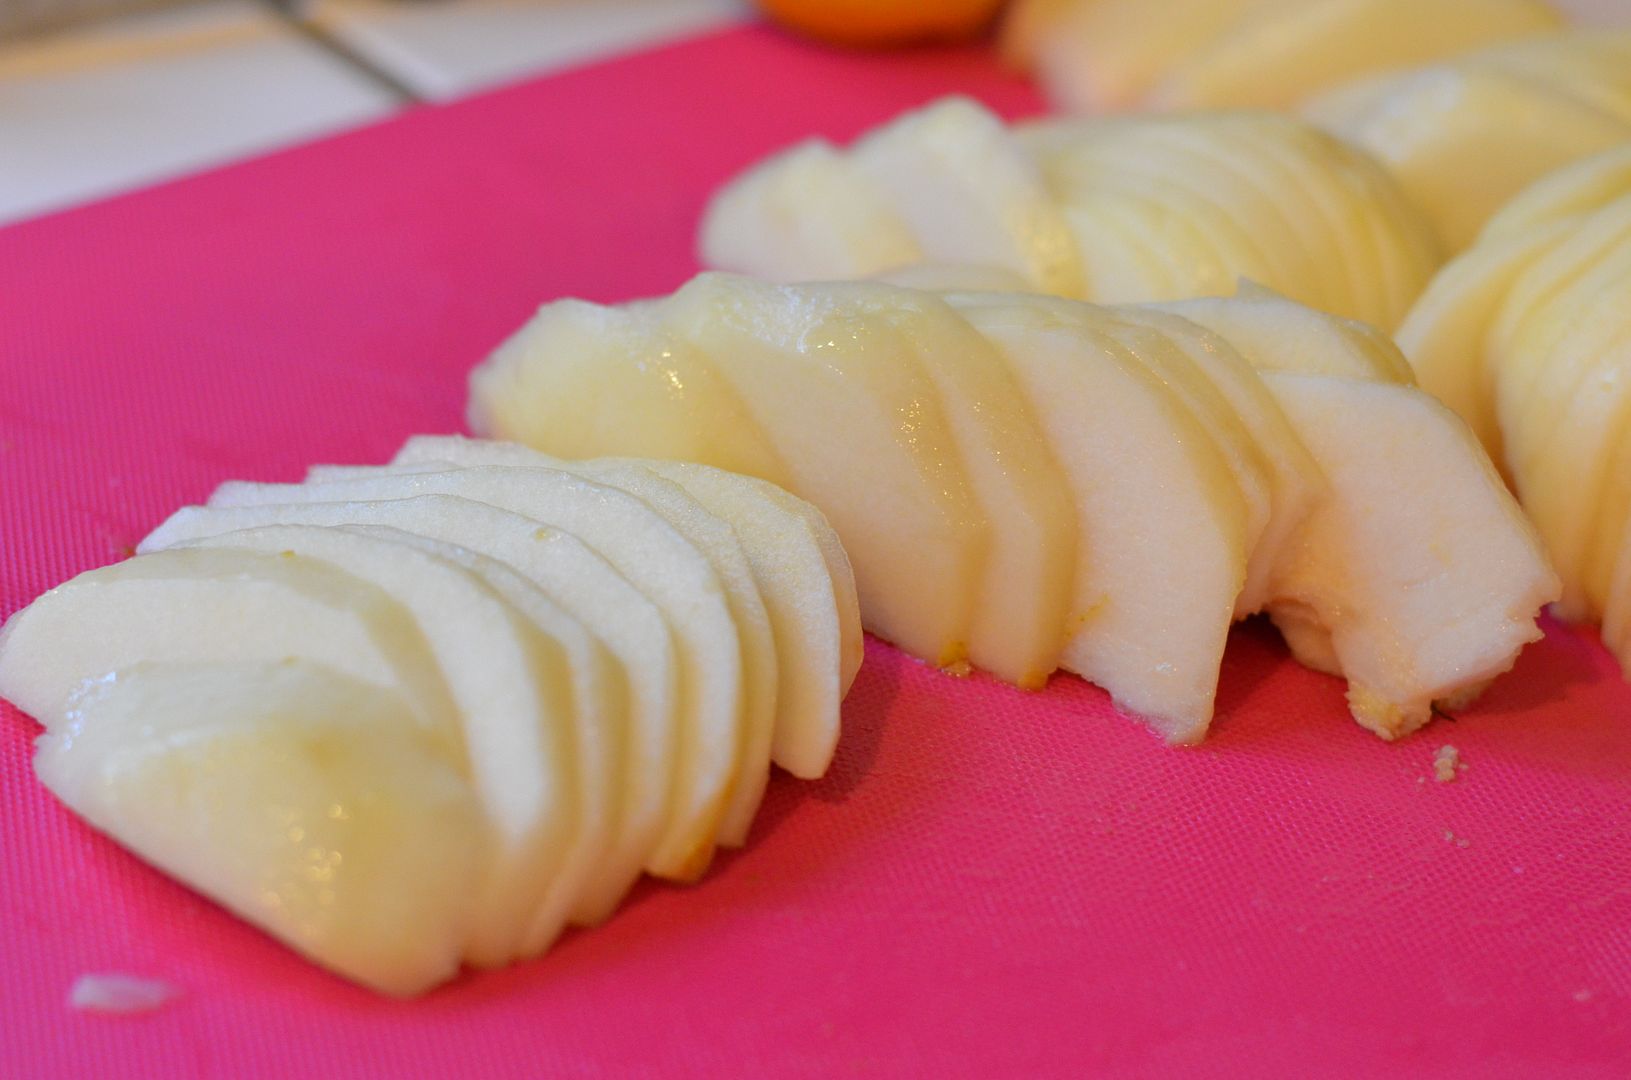
Slice each pear in uniform 1/4 inch slices.


Make your batter and put it in a tart pan.


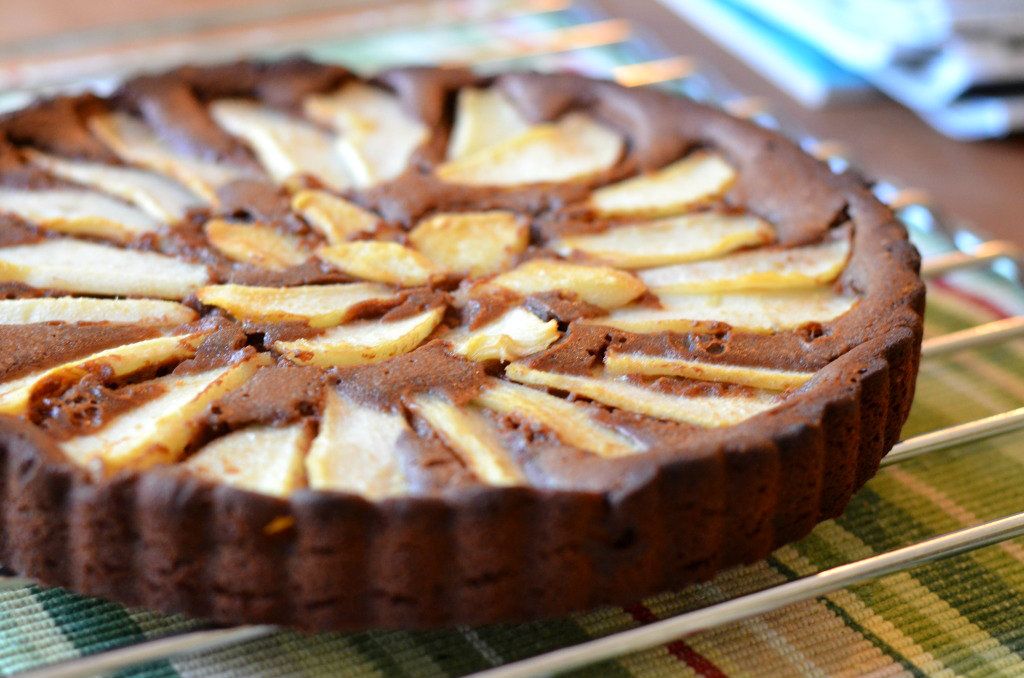
I forgot to take a picture before I stuck it in the oven. If you want it to look prettier than mine, layer your pears all around the outside, overlapping each pear a little bit. Don't put your pears in the middle like I did.
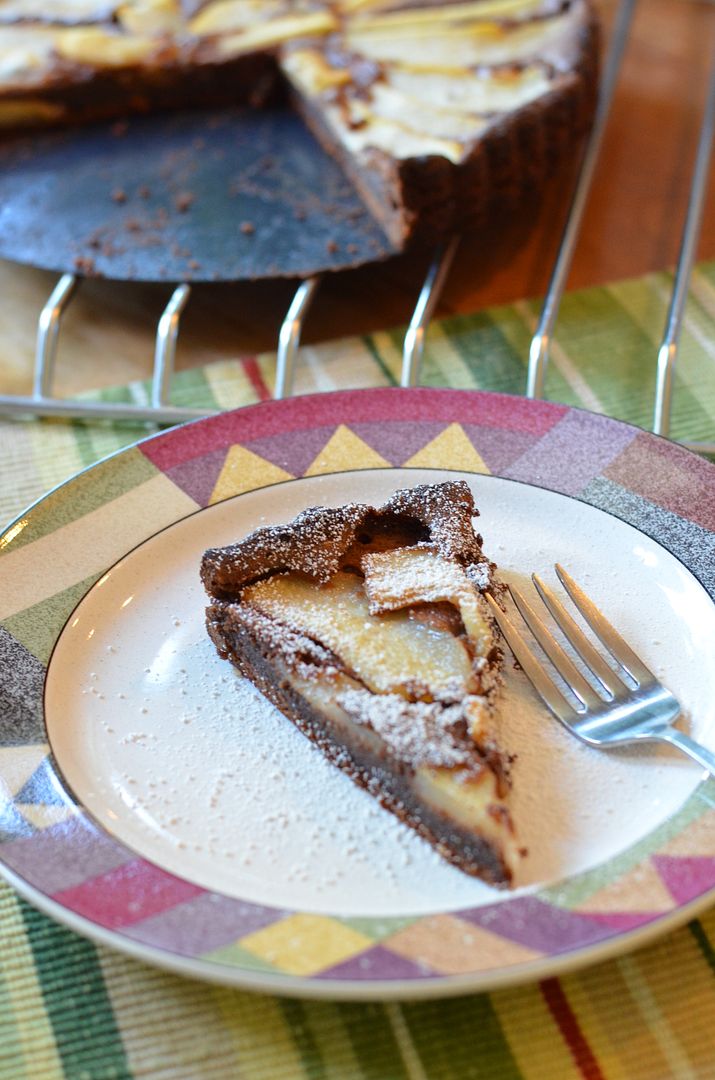

Chocolate Pear Tart

8 tablespoon or 1 stick room temperature unsalted butter, an extra tablespoon for tart pan
3 large eggs
3/4 cup blanched ground almonds
1/3 cup unsweetened cocoa powder
3/4 cup sugar
1 teaspoon vanilla extract
1/2 teaspoon salt
1/4 teaspoon almond extract
2 firm, ripe Bartlett pears
1/2 lemon

Heat oven to 350 degrees. Rub or brush a 9 inch removable bottom tart pan with 1 tablespoon of butter. In a food processor combine the ground almonds, eggs, cocoa, 8 tablespoons butter, vanilla, salt and almond extract. Spread into your tart pan.

Get your pears ready by peeling, coring and slicing them. Rub the pears with the lemon juice to prevent them from discoloration. Arrange the pears, slightly overlapping, in a circle on the top of the chocolate mixture. 

Bake for 45-50 minutes or until a toothpick comes out clean. Cool completely in pan.

Sprinkle with powdered sugar before serving.

Serves 8
Adapted from Everyday Food

Monday, August 13, 2012

Honey Garlic Pork Tenderloin


It's been a crazy few months. I moved out of my house, moved in with friends, put all my things in storage, started a new job, and started divorce proceedings with my husband. Crazy time in my life but I know many of you have gone through this and survived for the better so I will too. When life throws you lemons, start cooking! My new motto.

Hopefully now you understand why I'm so slow at posting these days. I'm just now starting to get inspired to cook and write again. Just minor details when doing a cooking blog. :-)


This is a recipe that I've been making for a few years and it's my favorite go to recipe for pork tenderloin. It is so, so, SO good. I hope you'll give a try. The honey garlic sauce is tangy, sweet and garlicky which goes perfectly with some coconut rice (a future post) and veggie. An easy but impressive meal for a busy weeknight. 

Now that pork only needs to be cooked to a 145 degree internal temperature, it is a fast meal and the meat stays juicy and tender. You can grill or bake the pork which makes it an ideal year round recipe. Make sure you let any meat rest about 10-15 minutes covered loosely with foil before you slice it. It will continue to cook and the juices will stay in the meat rather than run out when sliced. 

Honey Garlic Pork Tenderloin

1 - 1 pound pork tenderloin
4 tablespoons hoisin sauce
4 tablespoon soy sauce
4 tablespoons honey
2 tablespoons hot water
4 garlic cloves, minced
1/2 teaspoon salt
1 teaspoon sesame seeds
4 green onions, sliced
cooking spray

Preheat your oven to 400 degrees.

Combine hoisin, soy sauce, honey, water, garlic and 3 green onions into a small bowl. Pour 1/2 mixture into a large plastic bag. Add pork tenderloin and seal the bag. Make sure pork is coated with mixture and refrigerate for 30 minutes. 

Remove pork from bag and discard marinade. Spray a large oven proof skillet with cooking spray and heat on medium/high heat. Add pork tenderloin and brown on each side. Turn off heat. Brush with 1 tablespoon of sauce and sprinkle with sesame seeds. Place in oven and cook for approximately 20-30 minutes or until internal temperature reaches 145 degrees. 

Remove from oven and cover loosely with foil for 15 minutes. Slice and drizzle the remaining sauce on top. Sprinkle the last chopped green onion on top for garnish. Serves 4. (I suggest making two so you have dinner the following night - or even better, freeze it and pull it out on a night when you don't want to cook)

Adapted from Cooking Light